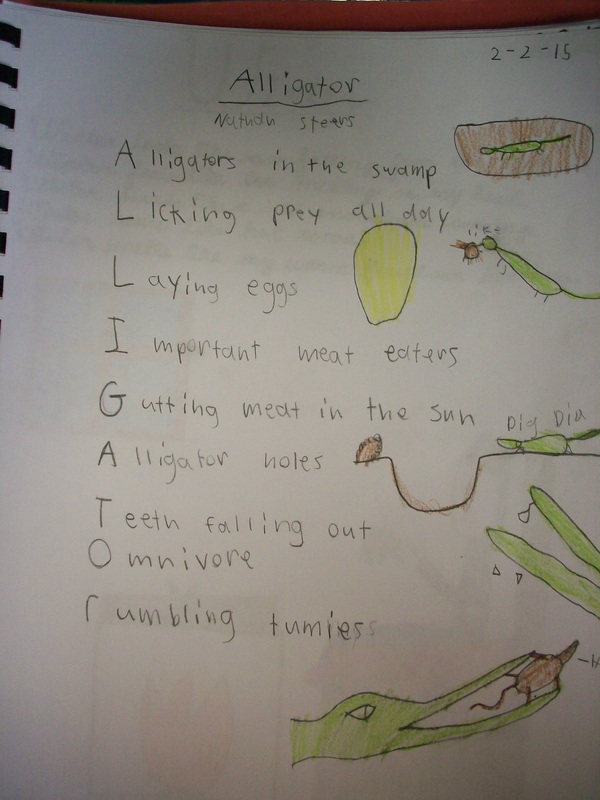
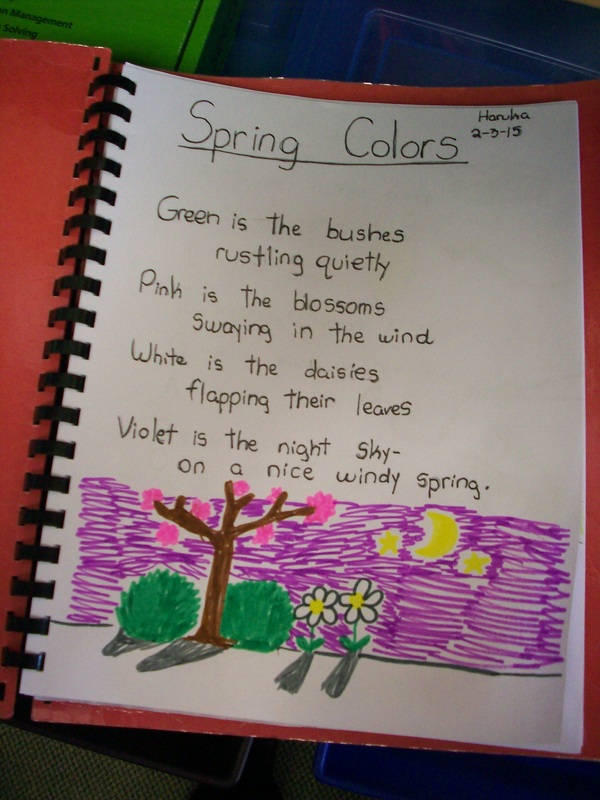
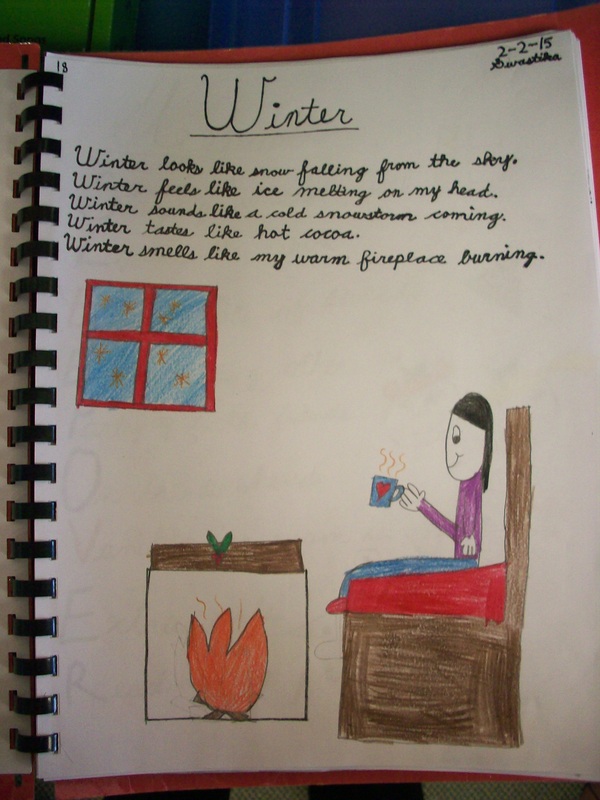
I think that writing poetry is a great way to provide mini-lessons (syllables, vivid verbs, adjectives, prepositional phrases, rhythm, imagery, etc.) that can be immediately applied to a short, yet important task. In our poetry unit, we read and interpret poems, but I also teach the kids to create their own using some formulaic styles. Each year we try our hands at acrostic, color, senses, and cinquain. If we can squeeze in haikus and couplets, that’s a big win. Rhyming can be a challenge at this age, but some kids are ready and eager to take that leap. Ultimately, I want the kids to be creative and take at least one poem through the writing process for publication in our class poetry book.
Author: Kristen Foley
Die for Smooth Transitions
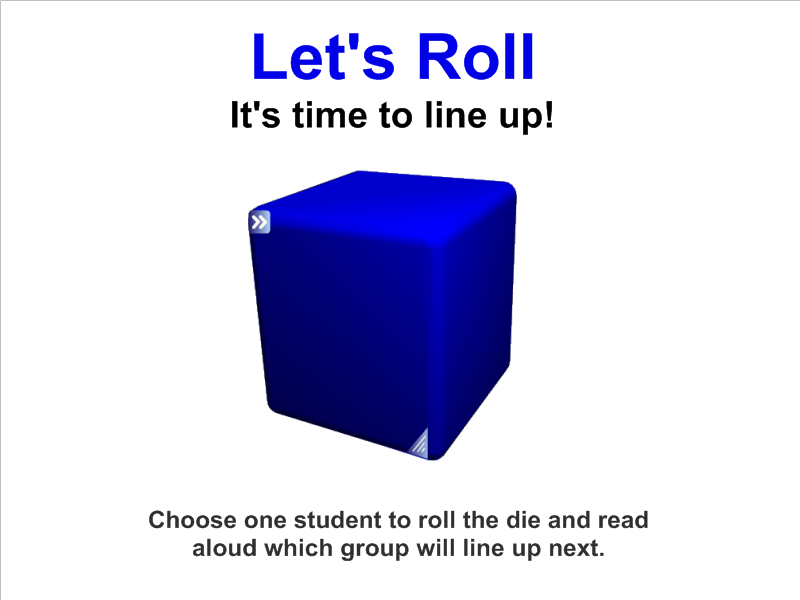
One of the greatest challenges for teachers is smooth transitions between activities. We often loose control of the class to chatter and chaos when we ask them to move from one location to another. In the SMART Notebook gallery, you will find a variety of dice. Choose one that can be edited. I prefer to label the six sides with table 1, table 2, table 3, etc. A student helper taps the die, and the next group to line up is decided. The students remain quiet as they anticipate the next roll. Movement is done in small chunks and so much time and energy is saved! Give it a roll in your classroom. You’ll just “die” for these smooth transitions!
Flexible Seating
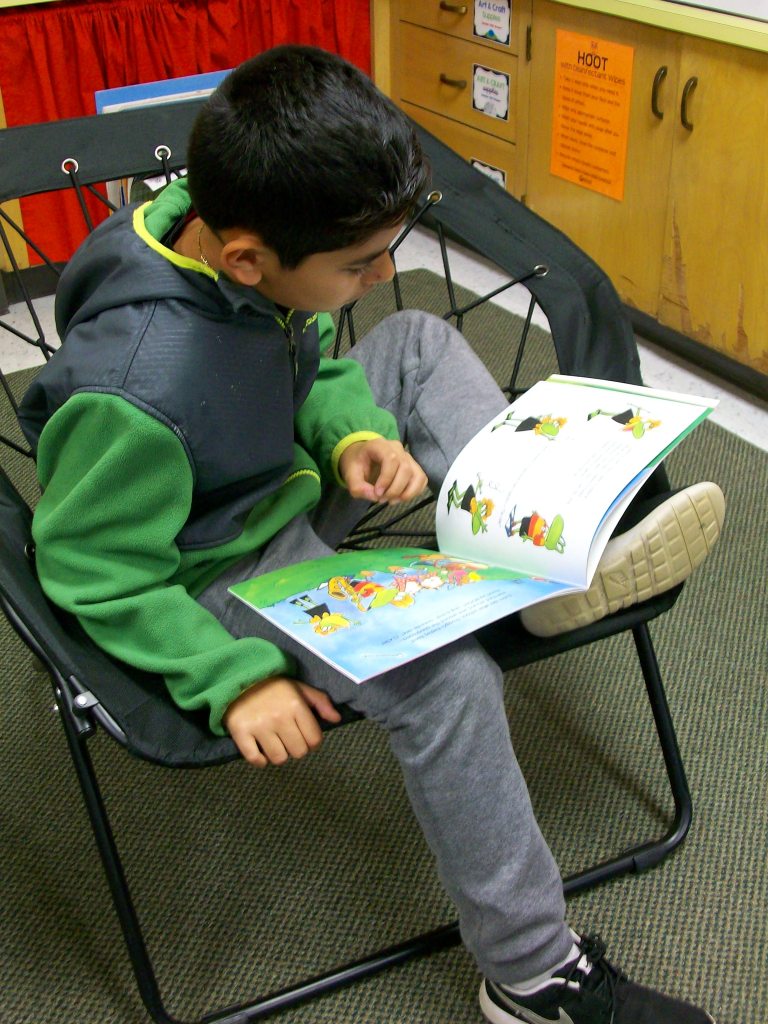
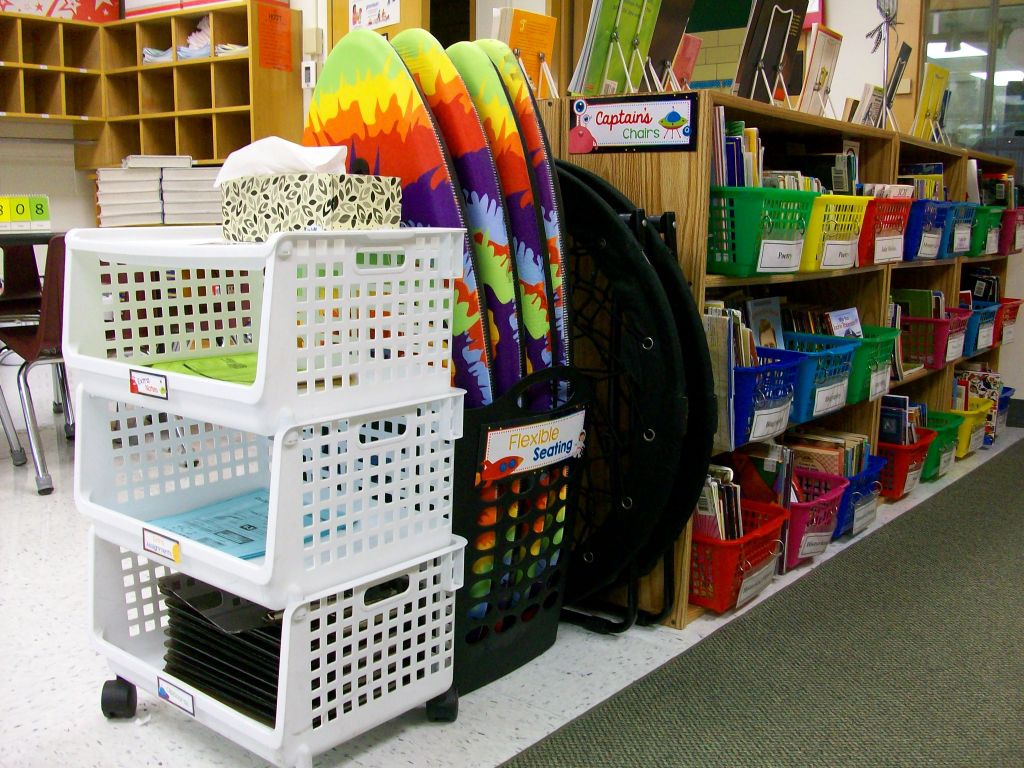
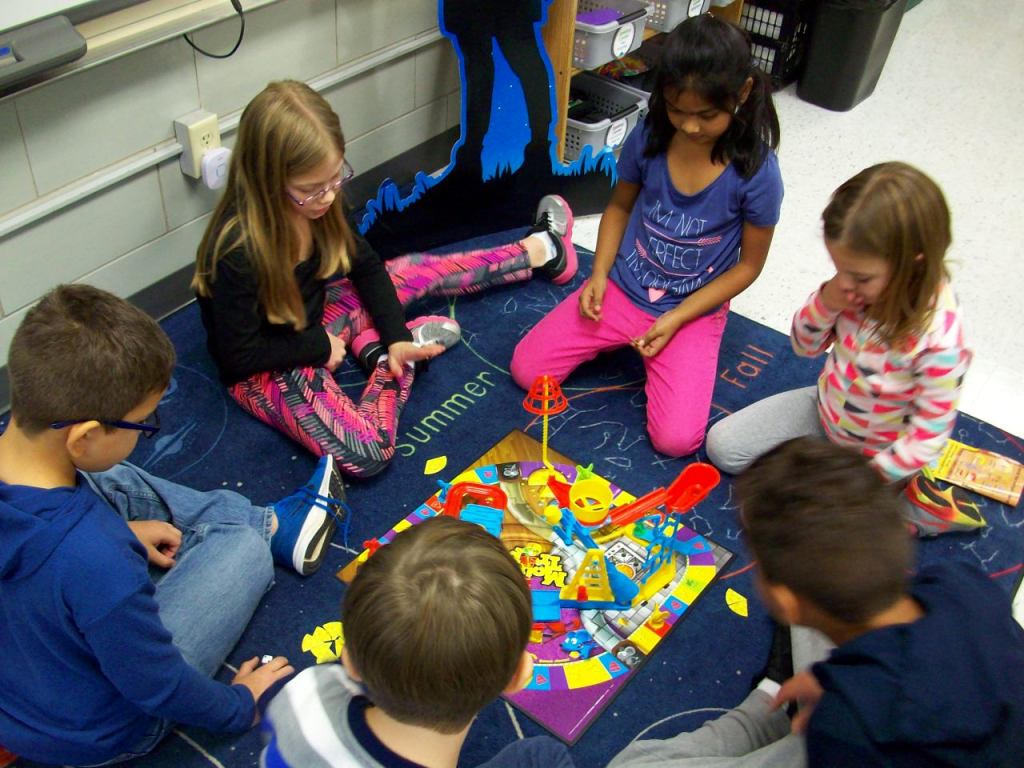
I’m not one of those teachers that removes all traditional seating from the classroom and replaces it with IKEA furniture. No offense to any who do this. However, it doesn’t work for me. I prefer to keep individual student desks, which allows kids a place of their own for their own supplies. (I only collect the basic community materials such as tissues and disinfectant wipes.) And while our room is set up in pods of four desks, there is still plenty of space for flexible seating. I have a kidney table, two large carpeted areas, six bungee chairs ($20 each on sale at Target), four surfboards ($5 each at Five Below), two ottomans, and some garden kneelers ($1 each at The Dollar Tree). All of the movable items stowaway very neatly. I use a tall laundry basket ($5 at Five Below) for the surfboards and kneelers. The foldable bungees stand up nicely between my counter and laptop cart. When I first introduce flexible seating at the beginning of the year, we work together to create an expectations poster “HOOT with Flexible Seating.” Using and returning materials is mostly a smooth process. You’ll always contend with a few students who rush, grab, or don’t put items away. These are good opportunities to review expectations and have kids reflect on their actions. I think the class enjoys the freedom of selecting where they do their work and who may be nearby just as much as adults do.
Student Desk Organization
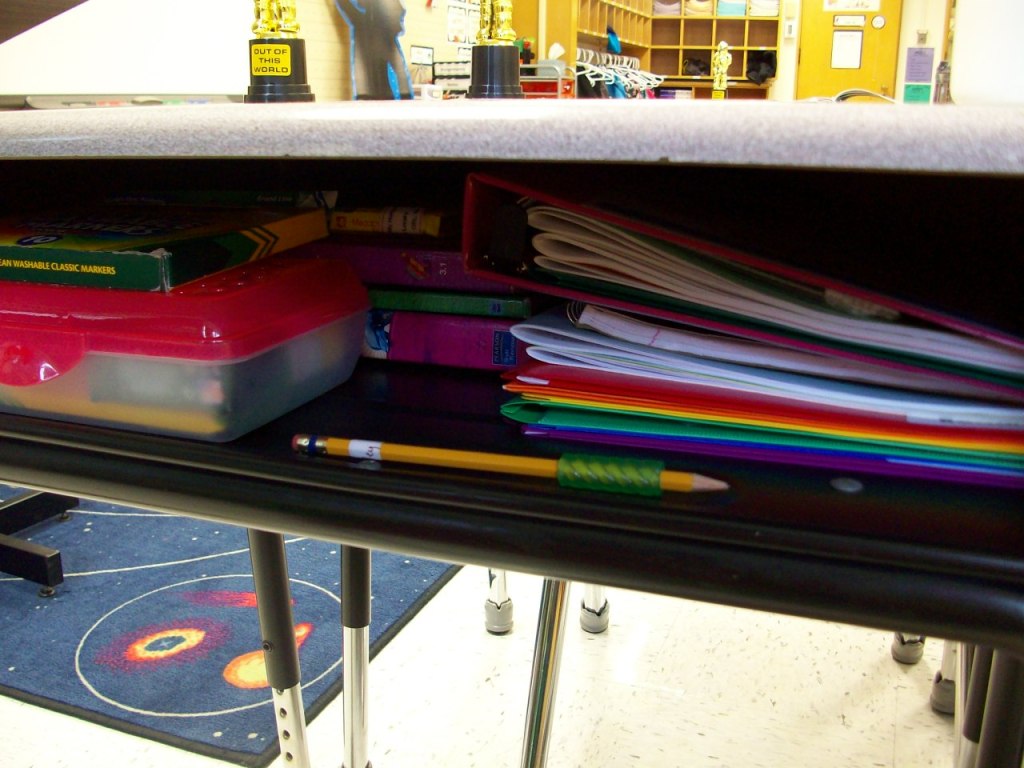

“A place for everything, and everything in its place!” From day one, my students are given ideas for staying organized at school. Books on the left with spine out (to read the titles), folders on the right in rainbow order, supplies in the box in just the right arrangement. Why? First of all, it makes for quick transitions and maximum use of our learning time. Second, it eliminates student stress and teacher frustration because items aren’t “lost” . . . and replacements aren’t needed. Yeah! And what teacher doesn’t cringe at the sight of cesspool desks bubbling over with crumpled papers and random supplies. Well, I certainly can’t ignore it! So, we altogether avoid it. Being disorganized just isn’t an option. I want students to take pride in their learning spaces and feel empowered to take charge. A little extra effort goes a long way in this case.
Checklists
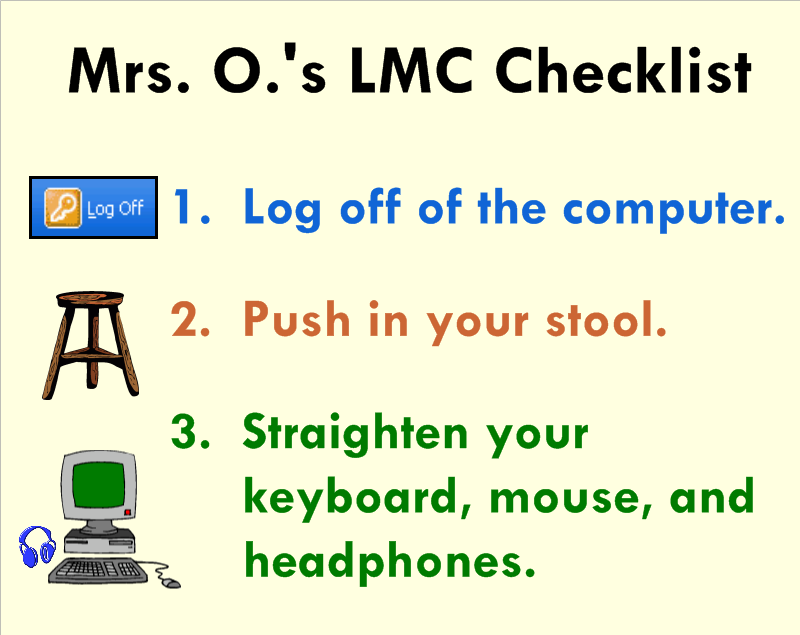
Think about all of the things you repeatedly say throughout the week. Think about all of the kids who are visual learners. Now think about how much time and breath you’ll save by making simple to do lists or checklist for your students using SMART Notebook! I prefer to use 3-5 simple statements coupled with a clipart image for each. The students will become so use to seeing and following the routine directions that you’ll smile and pat yourself on the back.
Participation Flip Charts

Who else has the same 3 to 5 students doing ALL the participating in a lesson? This was a problem I struggled with for a long time. I tried to give wait time, encourage new voices, include think-pair-share, and a variety of other strategies. When I came across these little flip charts at ReallyGoodStuff.com, I wanted to give them a try. Students place these on their desktops with one side facing me and one side facing them. Each time an individual participates (volunteers), he/she can flip a page and change the 3 into a 2, or the 2 into a 1, or the 1 into a 0! I set a goal of reaching 0 by lunchtime. While it hasn’t been a magical tool that has everyone participating, it certainly has encouraged many more students to get involved. I have students store these away in their math folders before we head to lunch and have been able to keep them in good enough shape to reuse for 3 years. These participation flip charts really help me as a teacher make sure I am calling on a variety of students and reflecting on why others may be more reluctant. It’s a great tool!
Tech Accessories
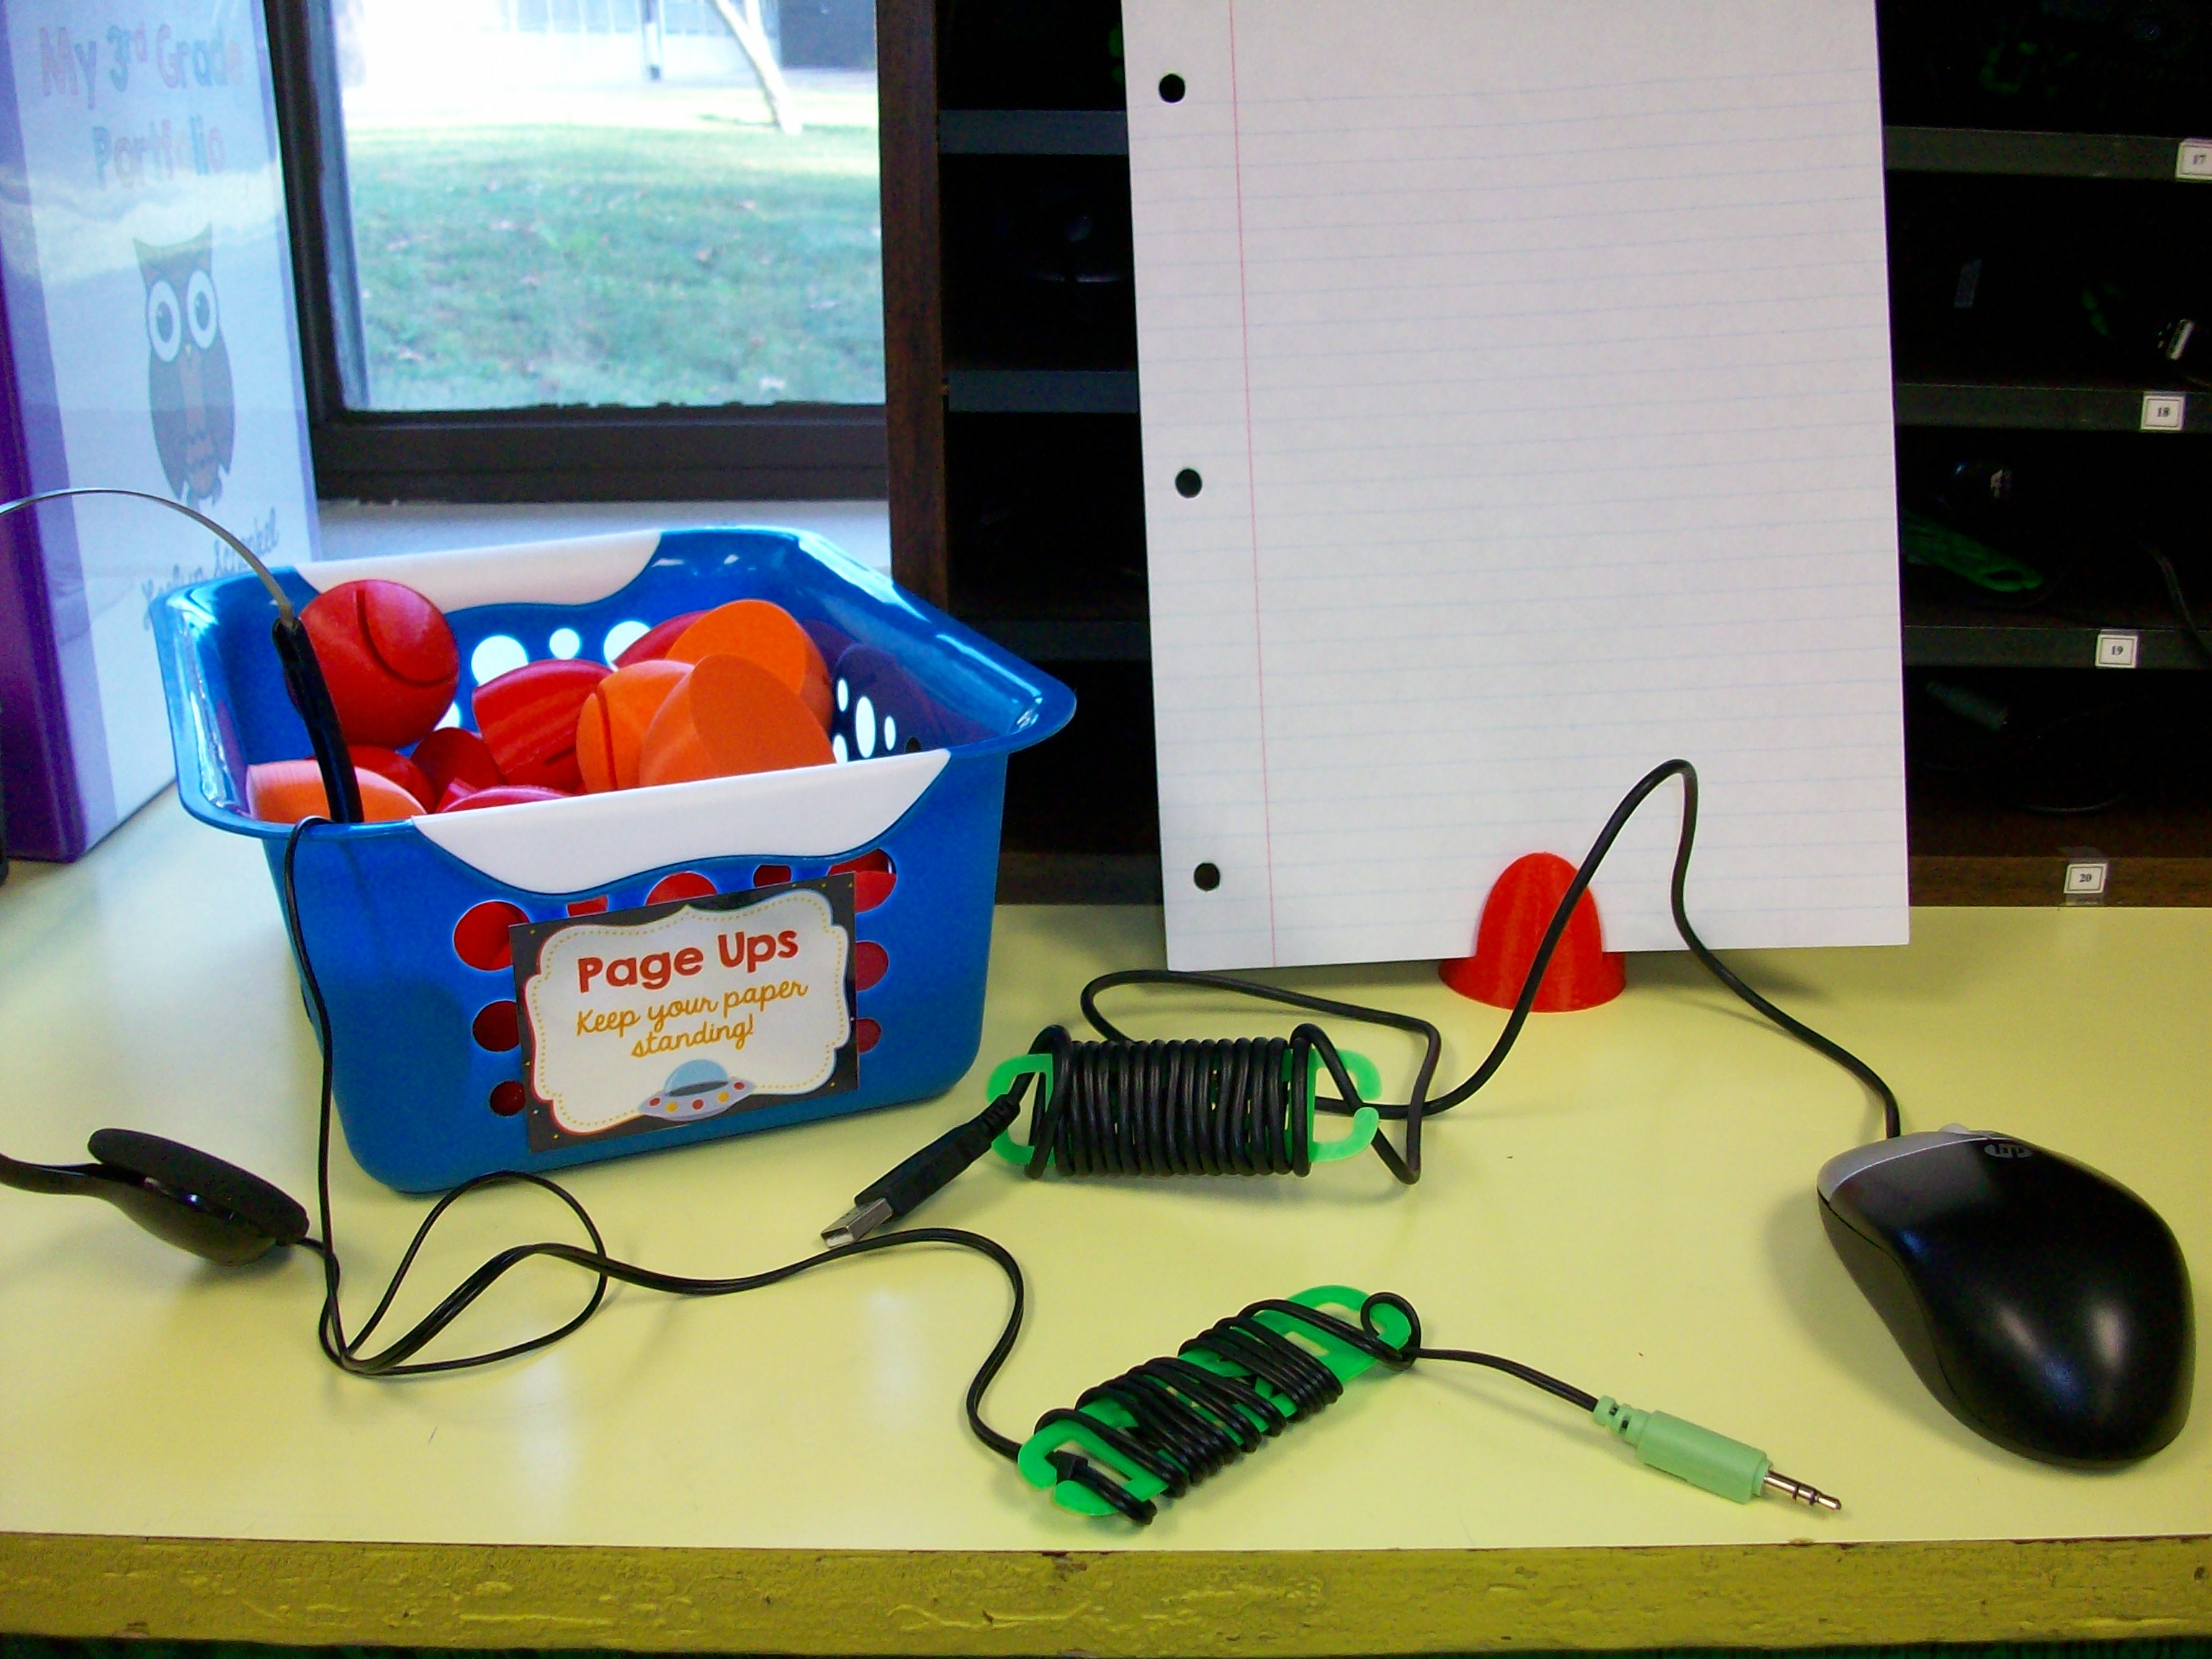

We LOVE a school-based 3D printer, especially when a great friend pops into the library throughout the day and cranks out 30 page ups and 60 cord wraps. Well, it took him a few days overall, but these items were worth the wait. I found templates on Thingiverse.com for a paper holder called a page up and skinny cord organizers called cord wraps. The plastic used for these items cost less than $0.50 a student. (A store-bought page up can be around $7 and cord wraps are $2+ each.) Plus, these tech tools can be reused every year. They are quite durable. I haven’t had any breaks so far. The wraps really help eliminate dangling cords on desktops (taking up space) or over the edges of desks (which can be a hazard as students walk by). Students store their headphones and mice in a our “Tech Bay,” which is a traditional mailbox cubby system labeled with their classroom student numbers (1-30). More organization for the kids to keep our class running smoothly!
Scientist of the Week
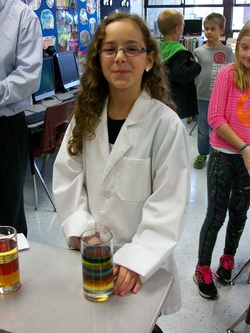


Each week (October-April), one student in our class is the featured scientist of the week. This is an optional challenge, but most students jump at the chance to pick their own experiment and present it to their peers. The scientific process is our guide and I provide students with kid-friendly websites for ideas. Safety is essential. I pre-approve age-appropriate investigations (no fire or strong chemicals) and ensure we don’t have duplicate experiments on the docket. On the day of the presentation, parents or other family members are welcome to come assist or watch. The third-grader takes the lead and manages all questions. Sure, I offer support as needed, but the students come prepared and handle inquisitions with confidence. Even if they are unsure, it’s great to see their honesty. Science is complex, so if an eight-year-old doesn’t understand all the ins and outs, we get it! What a great opportunity to build confidence and interest in science!
Basic Operation and Care
Components
The computer sends an image to the projector through a RGB or VGA cable. The projector transmits the image onto the interactive whiteboard. The board relays any input messages (use of pen tools or hand) to the computer through a USB cable.
When you press the board with a pen tool or your finger, the top layer of the screen makes contact with the back layer of the screen. Press with intent to ensure that your actions are recognized by the back layer.
Safety
- Never look directly at the projector’s light beam.
- Never touch the projector. It can become very hot during operation.
- Never use a chair to increase a student’s reach on the SMARTTM board.
- Never use other writing utensils (markers, pencils, ink pens, etc.) on the board. Keep these materials and others (scissors, liquids, etc.) away from the area.
- Be mindful of cords and the legs on portable models.
Cleaning and Orienting
Glass PlusR Multi-Surface Cleaner and a soft paper towel or cloth are recommended for cleaning the board. This should be done as needed. Try to make it a habit to clean and orient your board once a week.
Etiquette
Only one user can touch the board at a time. Since only one point of contact can be recognized by the board, so you may need to adjust how you hold the pen tools when writing. Do not rest your hand on the board. If you are right-handed, it is best to stand on the right side of the board. This way your body will open up to your audience.
The Pen Tray
The four SMARTTM Board pens are simply hollow plastic tubes. Optical sensors on the pen tray notify the computer when a pen is removed. If you pick up two or more tools without returning the others, the board will recognize the last tool selected.
One pen try button will launch the keyboard. The second button allows you to access right-click. Pressing them both at the same time will open the orientation screen to align the board with the projector.
Indicator Lights
The status light (ready light) is located on the bottom right side of your SMARTTM Board.
|
Color of Light |
Status |
| Not Lit |
|
| Solid Green |
|
| Flashing Green |
|
| Solid Red |
|
| Flashing Amber |
|
| Solid Amber |
|
First Aid Center

How many times is your instruction interrupted by students needing a bandaid, ice pack, mint, or lotion? And the walk and wait at the nurse’s office takes valuable time away from learning. Of course, there are times when the nurse does need to evaluate the student’s health, but about half of the time I can triage the need in just a few seconds. And having a First Aid station in my classroom helps me teach student to be assertive and self-sufficient. My area includes ice packs in the mini-fridge, lotion, tissues, and sick bucket. The drawers house bandaids, Lifesaver mints, Lifesaver fruit candy (for kids who don’t like mint), latex gloves, cheap sandwich baggies to wrap around the ice packs, and hall passes to see the nurse with a pen. Everything is in one location. During the first days of a new school year, I spend time talking to the students about how to evaluate, communicate, and treat their needs. Together we create a “HOOT – How Oakland Operates Together” poster with action statements such as, “Return ice packs to the fridge and throw away the baggie.” Our First Aid station has been a great addition to the classroom!
