
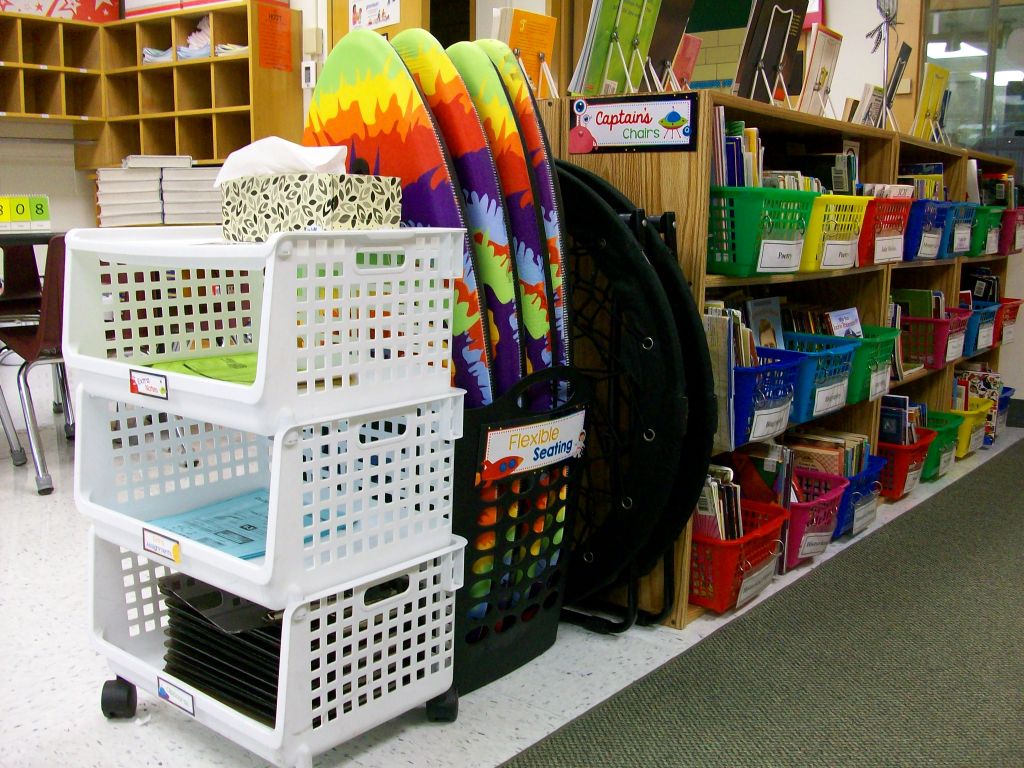
Color and variety! Lots of books at many levels! I LOVE an organized classroom library that stays as organized on day 100 as it is on day 1. Does that mean no one can touch the baskets? No. However, I train my students to understand how the books are grouped and my expectations for taking/returning. Every teacher has a method that works best for him/her. My baskets are arranged by genres with a thematic display on the top that rotates out every 3 weeks. I prefer to let students check out one book at a time using a place-holder checkout card. Any books that I read aloud are stored in a special “Read Alouds” tub after I share them. This allows students to easily locate those titles to re-read themselves. Plus, I can pull those books and reference the stories or literary features at any time. This is great for compare/contrast or reminding the class of great writing techniques. The library is one of my favorite sections of the room, and I’m sure the kids would agree!
Author: Kristen Foley
Got Wordle?
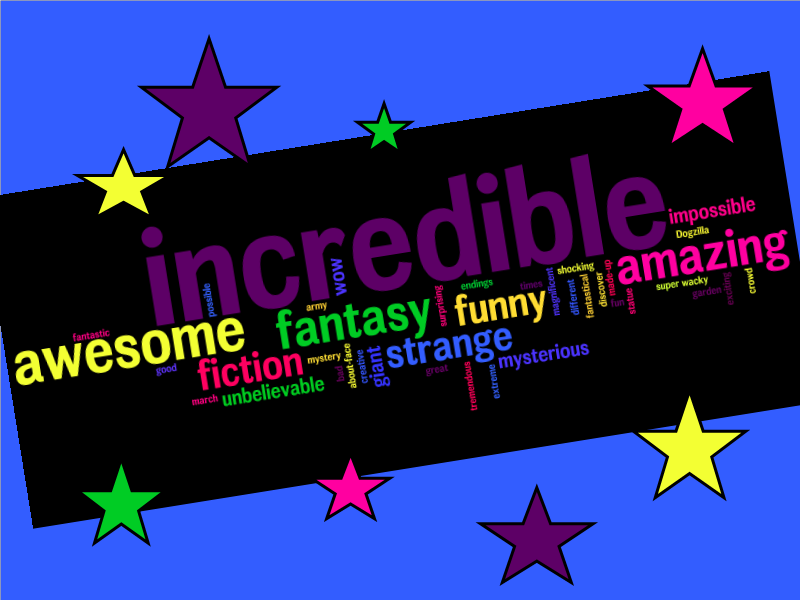
Wordle, www.wordle.net, is a website for creating word clouds. Simply type in a series of words using commas. The more often the word is included, the larger it will appear in the final word cloud. Then customize the themes, fonts, and colors. Use the SMART camera tool to take a picture and add it to your SMART file. There are a variety of classroom applications. Ask your students to write down five words to describe a character from a story, a scientific concept following the unit of story, or an upcoming holiday. This can be an individual or small group task. Or create a Wordle on a topic of study and use it to preview the chapter. Students can view it and make connections to prior knowledge. Or type each of your student’s names to create a class word cloud that can be an image on your classroom website or your classroom computer’s desktop background. TIP: Type your words in a Word document and paste them into the field on the site. Because if you decide to “go back” and add, delete, or change words, you will be sent back to the home page. Your work is not saved on the site. Also, for two words that you’d like to stay together such as United States, put a ~ between the words (United~States).
Group Generator

I love the random group generators available in the SMART Notebook gallery. After searching “random,” look under the “multimedia” category. I use the one pictured above and include student numbers rather than names. Since this grouping tool is part of many different SMART files (reading, math, science, writing), I want to keep it general enough to be used year after year. After entering number/names, chose the number of groups you’d like to make. Then “generate” to see the random groupings. If a student is absent and you want to remove his/her number/name, do this on the first page before generating. Then be sure you don’t leave an empty fields. The function will only group the students prior to the open slot. The quick fix it to move the last number/name of your class into the empty spot.
Communication Cups

Grab some red, yellow, and green Solo cups (or any brand will do) and improve your small group communication! I have each team take a set of three colored cups when they set off to start groupwork. They begin with a green cup on top. If they need teacher assistance, they move the yellow cup to the top. This is a signal to me that I need to check in with that group soon. If a red is on top, that means the group needs me right away and cannot move forward in their work until I stop by and answer a question. By using these communication cups, I can scan the room and identify when group I will go to next.
Pete’s Presentations

Phillip Martin has outdone himself with his collection of sites offering educators FREE PowerPoint presentations, education websites, and clipart. The main site, Pete’s PowerPoint Station, has links to numerous resources. I’d recommend viewing all of the themes and topics at Pete’s Presentations because you can look at all of the possibilities. Sub-sites include Gretta’s Game Station and Hannah’s Homework Help Station. Don’t miss the clipart link. Mr. Martin’s unique, colorful cartoon style appeals to all children.
As long as you use it for your classroom (newsletters, website, interactive whiteboard lessons, self-made worksheets, etc.), these amazing resources are yours at no cost. He does ask that you tell someone else about the site. I’d say that is the least we can do to thank Mr. Martin for his outstanding artistry and organization. This is a teacher’s jackpot!
Pete’s Presentations
http://www.pppst.com/themes.html
Gretta’s Games
http://games.pppst.com/index.html
Hannah’s Help
http://resources.pppst.com/index.html
Circle Tap to Erase

Do you need a shortcut for erasing a large area of writing on your SMART Board™? Try “Circle Tap” to erase words or drawings created with a pen tool.
- Make a complete circle on the board using the eraser around an area with writing. You can use the actual eraser tool in your hand or by clicking on the eraser in your top toolbar. Make sure the circle ends wear you began. And don’t dawdle. If you take too long to draw the circle with your eraser, this will not work.
- Tap firmly in the center of the invisible circle you drew. Your writing within that area will disappear.
- This will only work on words or drawings that were created with a pen tool. Typed text, shape tool objects, graphics, etc. will remain on the page.
- This skill sometimes takes new users a few attempts to master. Remember . . . draw complete circle with the eraser tool and firmly tap in the center.
Orienting the Board

This process of orienting the screen will tell your computer where the projected image is located on the SMART Board™. I recommend orienting your board at the beginning of each school week. Some boards are mounted in an area of the school building that has more movement on the floor or roof above, which will cause the projector to become out of alignment from time to time. You can orient your board even in the middle of a lesson if you notice your point of touch is off. It will only take 10 seconds.
- On the pen tray attached to your SMART Board™, click the keyboard and mouse buttons at the same time. A gray screen will appear which will allow you to orient your SMART Board™.
- Using the pen tool tip, firmly touch the yellow center of each red + sign and release. I prefer to touch near the + sign, firmly drag my pen tool tip into the yellow center, and remove the pen when I have it perfectly centered. The SMART Board™ actually recognizes the point of release, not the first point of contact on the screen. Some teachers prefer to use a finger instead of a pen tool for orienting. Continue marking these points as they appear on the screen. A normal-sized board will have 9 points. Widescreen boards will have 12 points.
- If you make a mistake during this process, press a key on your pen tray to go back and re-do the previous + sign.
- When you finish with the last point, this orientation screen will disappear. You will be returned to the last program you had up on your computer screen.
Graffiti Wall

I sometimes use a traditional paper graffiti wall to accompany a novel study, read aloud, or thematic unit. It gives students an opportunity to express their thoughts in words and pictures and promotes a written discussion. The SMART™ Board takes this activity to another level. For a chapter book, you can have multiple SMART Notebook™ pages, one for each chapter. The larger electronic version of a graffiti wall also allows you to more easily discuss posted comments and questions with the entire class. It can be left up for students to use while the teacher reads aloud, during silent reading, or as a literacy station activity.
Linking

- Add a hyperlink to a website, an attachment, or another page within your file by first selecting your text or image. A blue line will appear around it to signify it was selected to have an action performed.
- Using the drop-down arrow, select “Link.”
- Paste or type in the web address.
- Decide how you’d like your hyperlink to launch. Your choices include “Corner icon” or “Object.”
- Choose “Corner icon” to click directly on a small globe, paperclip, or page icon.
- Choose “Object” to click anywhere on the text or image.
- To remove this feature, click once on the image or text. A blue line will appear around it to signify it was selected to have an action performed. Use the drop-down arrow to select “Link” and “Remove Link.”
www.multiplication.com

If you are a teacher or parent of a school-age child, www.multiplication.com is the best site I’ve found for practicing the basic X facts. This site includes worksheets, timed tests, hands-on classroom games, and flash cards, but the real treasure is the assortment of interactive computer games for learning individual fact families. While mixed practice is also available, it’s wonderful to focus on just the recently introduced fact family. The plethora of games includes “Classroom Capers,” “Jungle Jim Goes Fishing,” and “Patty’s Paints.”
I like to model a new game for the entire class each week. Then, while the students complete a practice worksheet on the fact family we are currently learning, one student goes to the SMART™ Board to play the game and another watches and waits in the batter’s box. For some games, the student can take the full timed minute to try to answer as many questions correctly and attempt to earn a high score. In these cases, the game becomes a competition amongst the students. Other games may require a limit of 5 problems per student, because the rounds take several minutes to complete. It may also depend on the amount of time you can set aside and the number of students in your classroom. I find that as students finish the independent worksheet, they watch their classmates at the SMART™ Board. This allows the other students to finish their paper assignment at their own pace, and keeps early finishers engaged.
