I love, love, love performing readers’ theatre plays with musical accompaniment with my third graders. Two picture books that I often use are One and Zero by Kathryn Otoshi. Not only do these stories have powerful messages, they include abstract characters–colors that become numbers. Thus, my students can wear a black shirt and jeans and hold the two-sided paddles to represent their characters. Each color/number is matched with a musical instrument and rhythm that corresponds to its personality (sunny, regal, calm). These books are mostly narration with a few memorized character lines, so I have three narrators and use Post-It notes on the back of the paddles for characters that may need a reminder. Plus, I train my narrators to “feed” the line to the actor if needed. For example, if the character doesn’t remember it’s his/her turn or just blanks on the script, the narrator will say, “One said, ‘If someone is mean and picks on me, I for one stand up and said NO.'” Then the student playing that role can repeat the line to the audience.
If you haven’t tried a readers’ theatre before, go with a pre-made script. Don’t worry about costumes, props, or adding music. You can add those extra elements when you and the kids feel ready. I’m sure that you will gain confidence as the students reveal their energy and creativity.
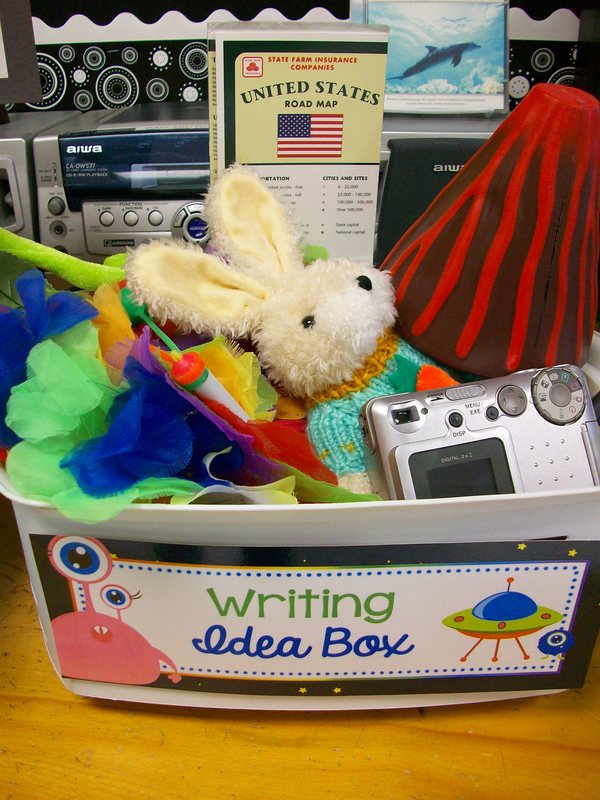
Writing is often the most dreaded tasks, according to students. So how can we make it more interesting, more inspiring, more fun? I got notion for a writing “idea box” from author Jerdine Nolen. In our basal reader, she had written a letter explaining that her story ideas came from everyday activities like washing the dishes and everyday objects like a hat. She had a box of items that she would look through to spark story ideas. Seriously? We can do this in our classroom for our students! Not only was it easy to prep, it was easy to explain and implement. I gathered some items that might lead to adventure stories (old camera, old phone, map, glasses, pirate doubloon, silk rose, stuffed animals, hourglass, etc.) I modeled how I chose the plastic gold coin and it gave me the idea for a time-traveling adventure. I read my fictional story about a boy who found this unique coin while walking to school. As he picked it up, he began to feel dizzy as if he were falling . . . into another world! If they wanted, students were encouraged to select an object from the tub and bring it to their workspace for inspiration while writing. Sometimes teams of 2-3 worked on a collaborative story. Other times, the students sat side-by-side to share an item but compose their own individual pieces. And occasionally, kids would want to incorporate more than one object from the basket. It was all ok by me! As long as they were motivated and writing, I was on board. I was pleased as punch when students finished their first stories and asked to get another object and begin a new one. Music to my ears!
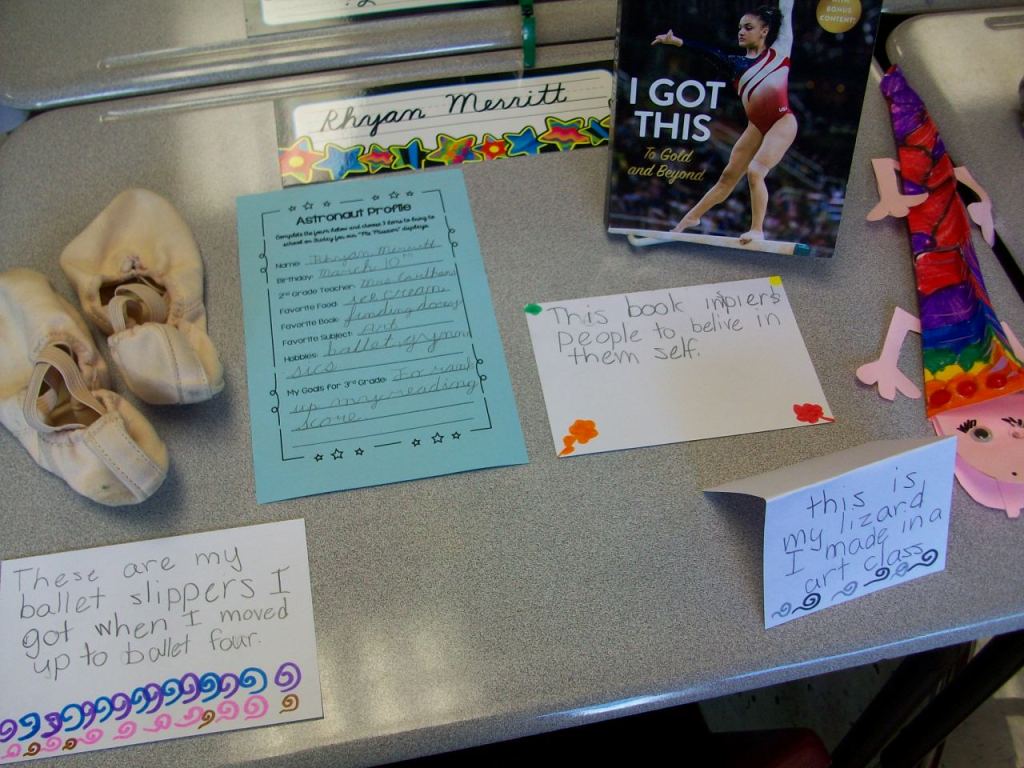
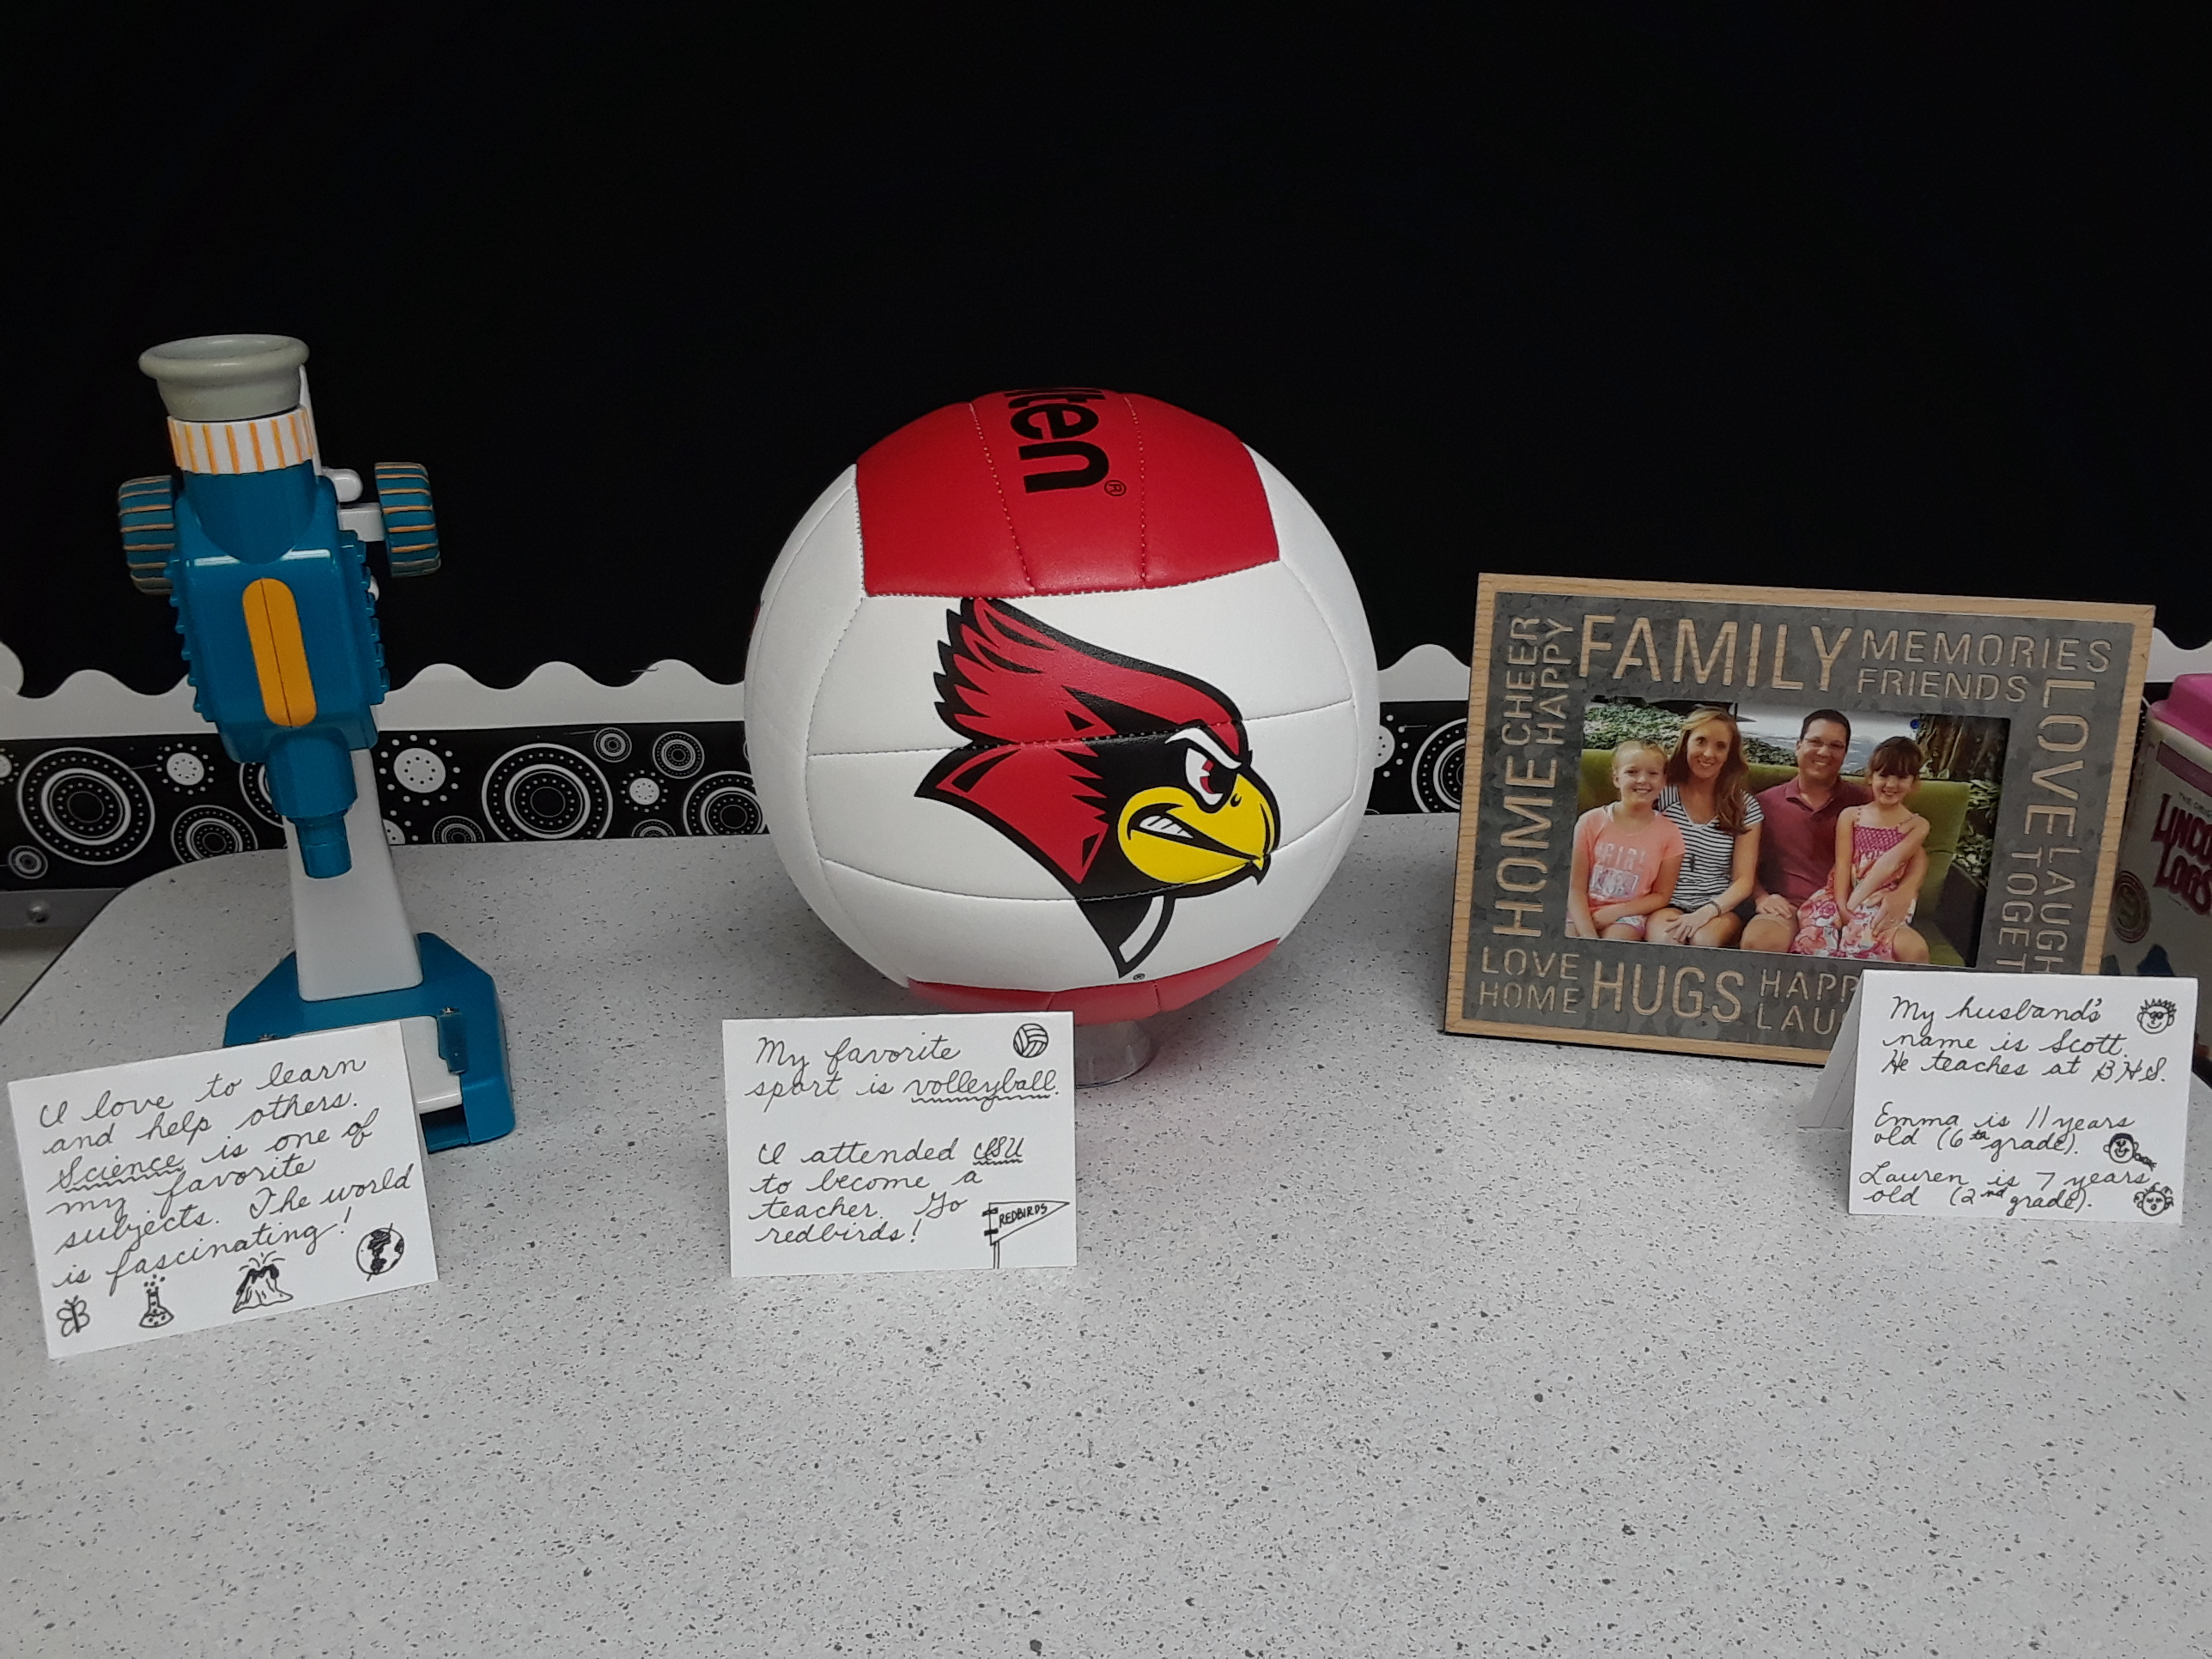
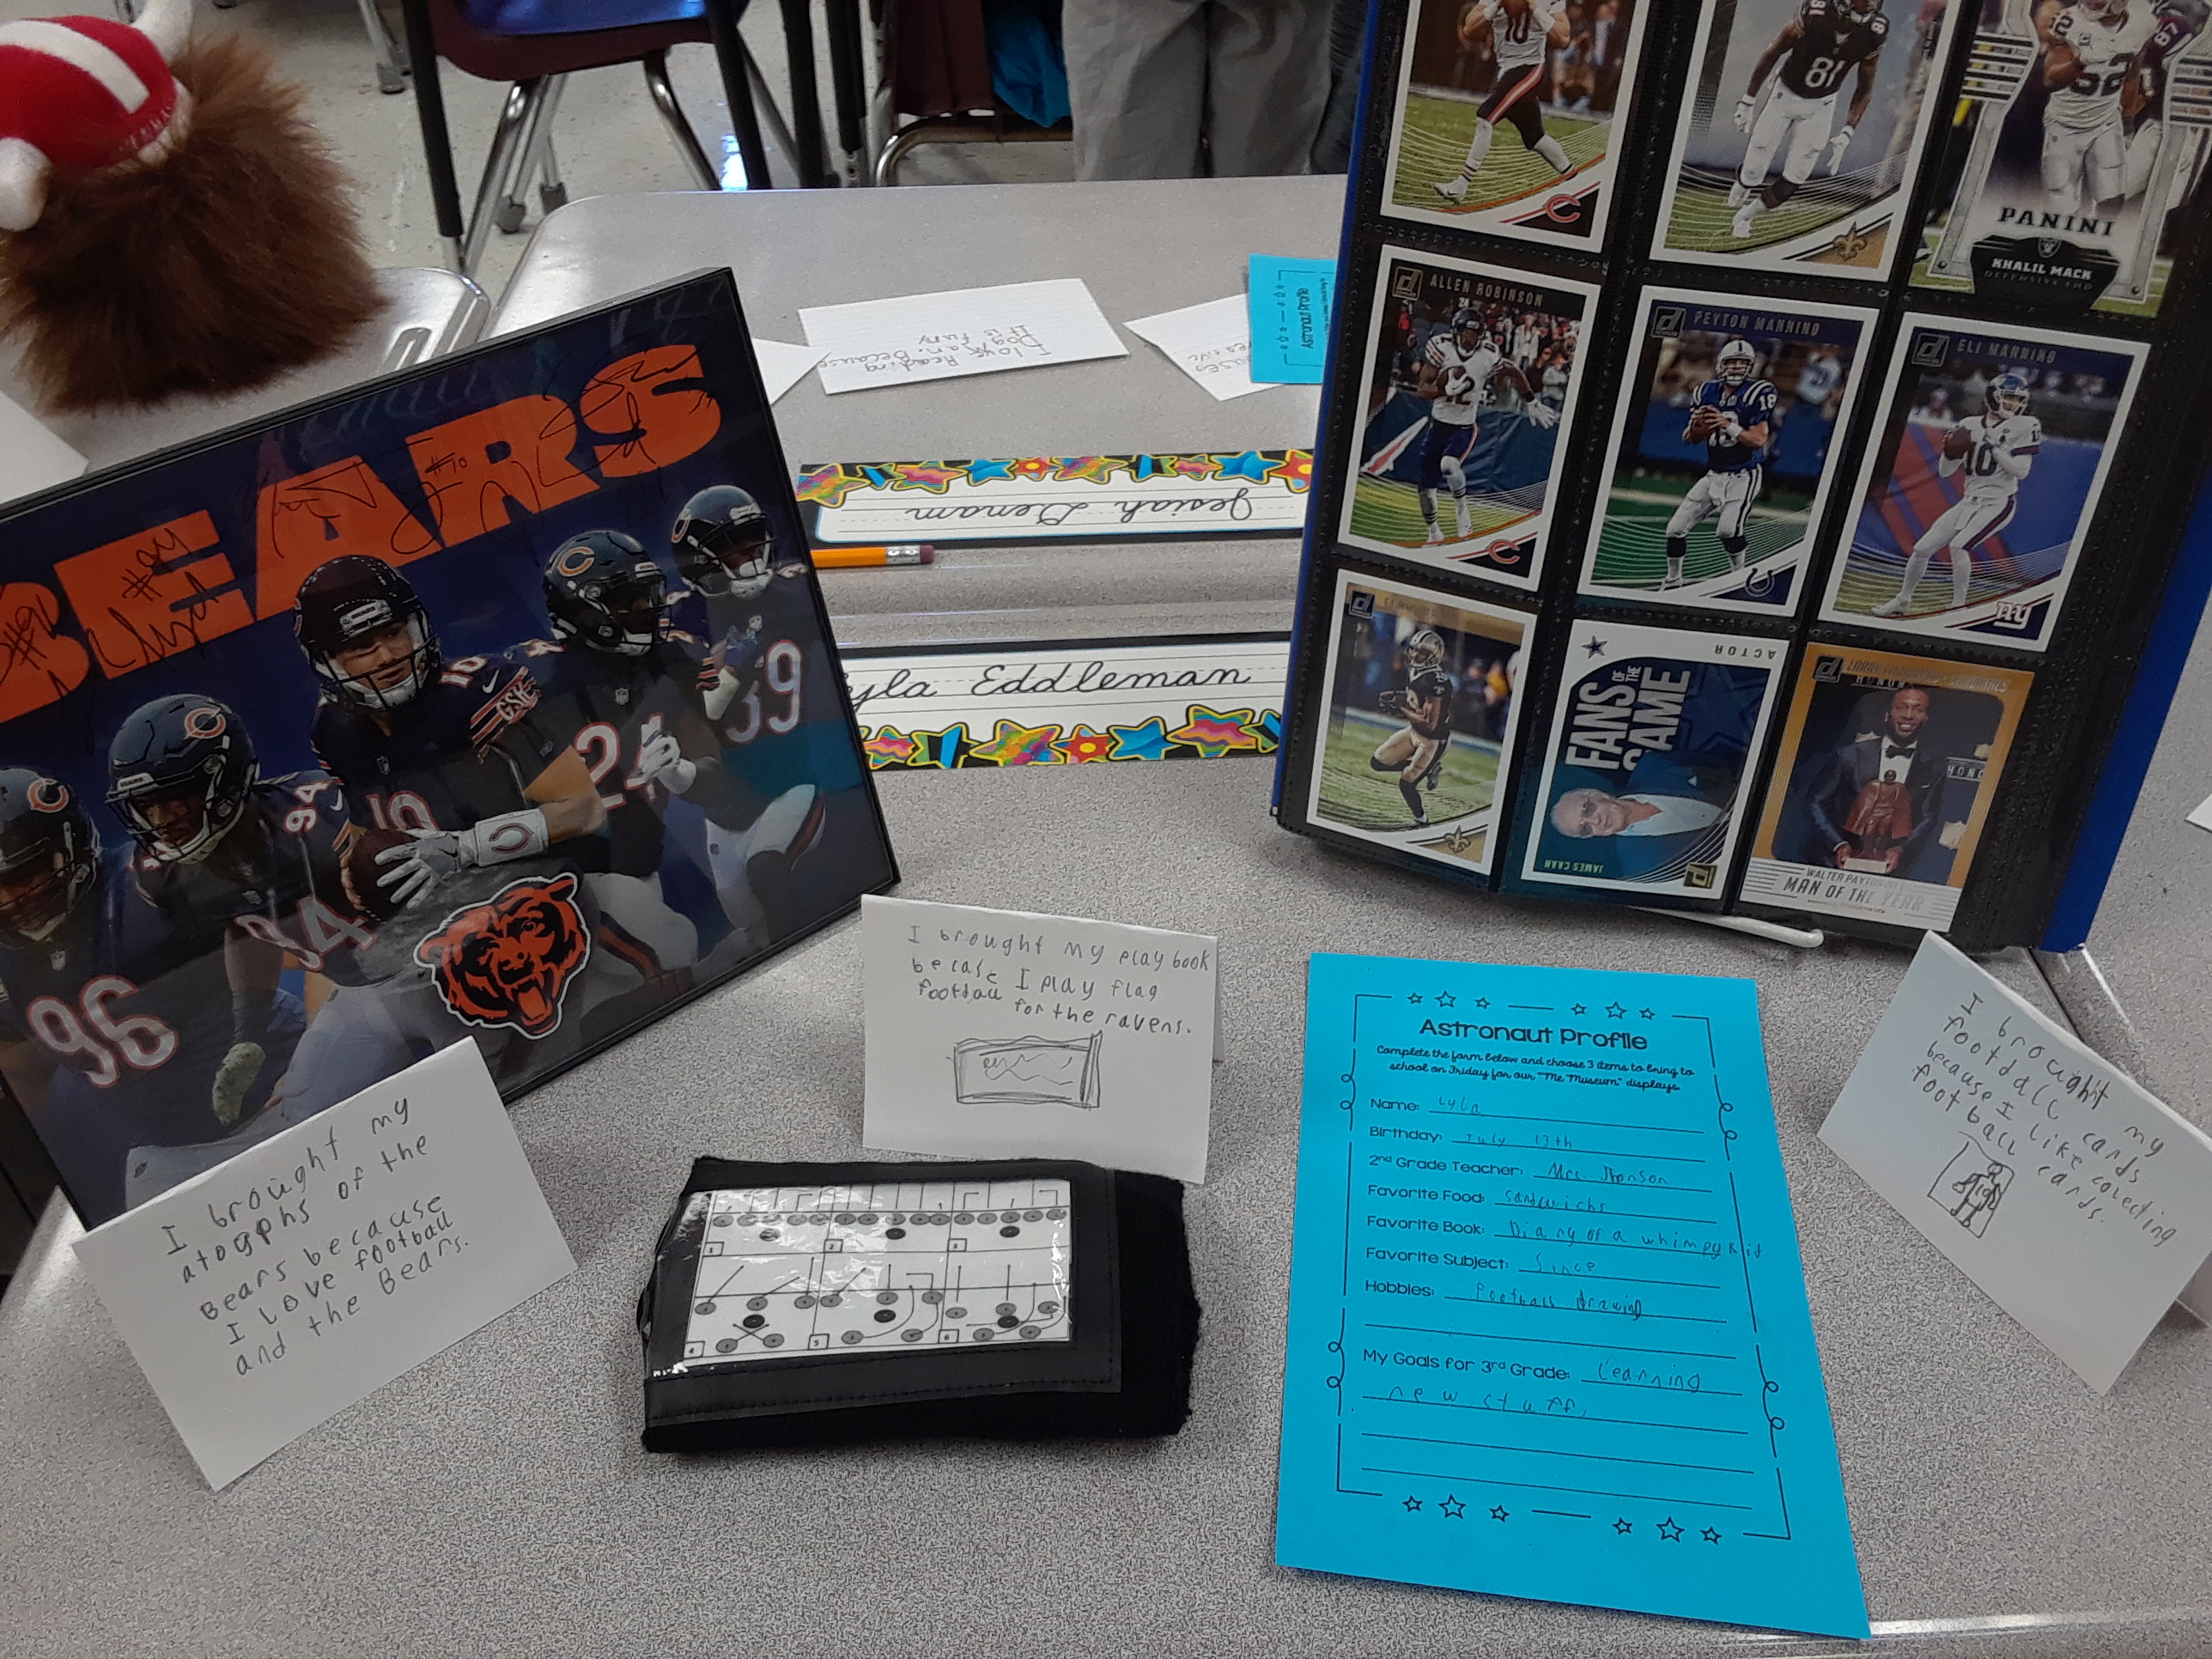
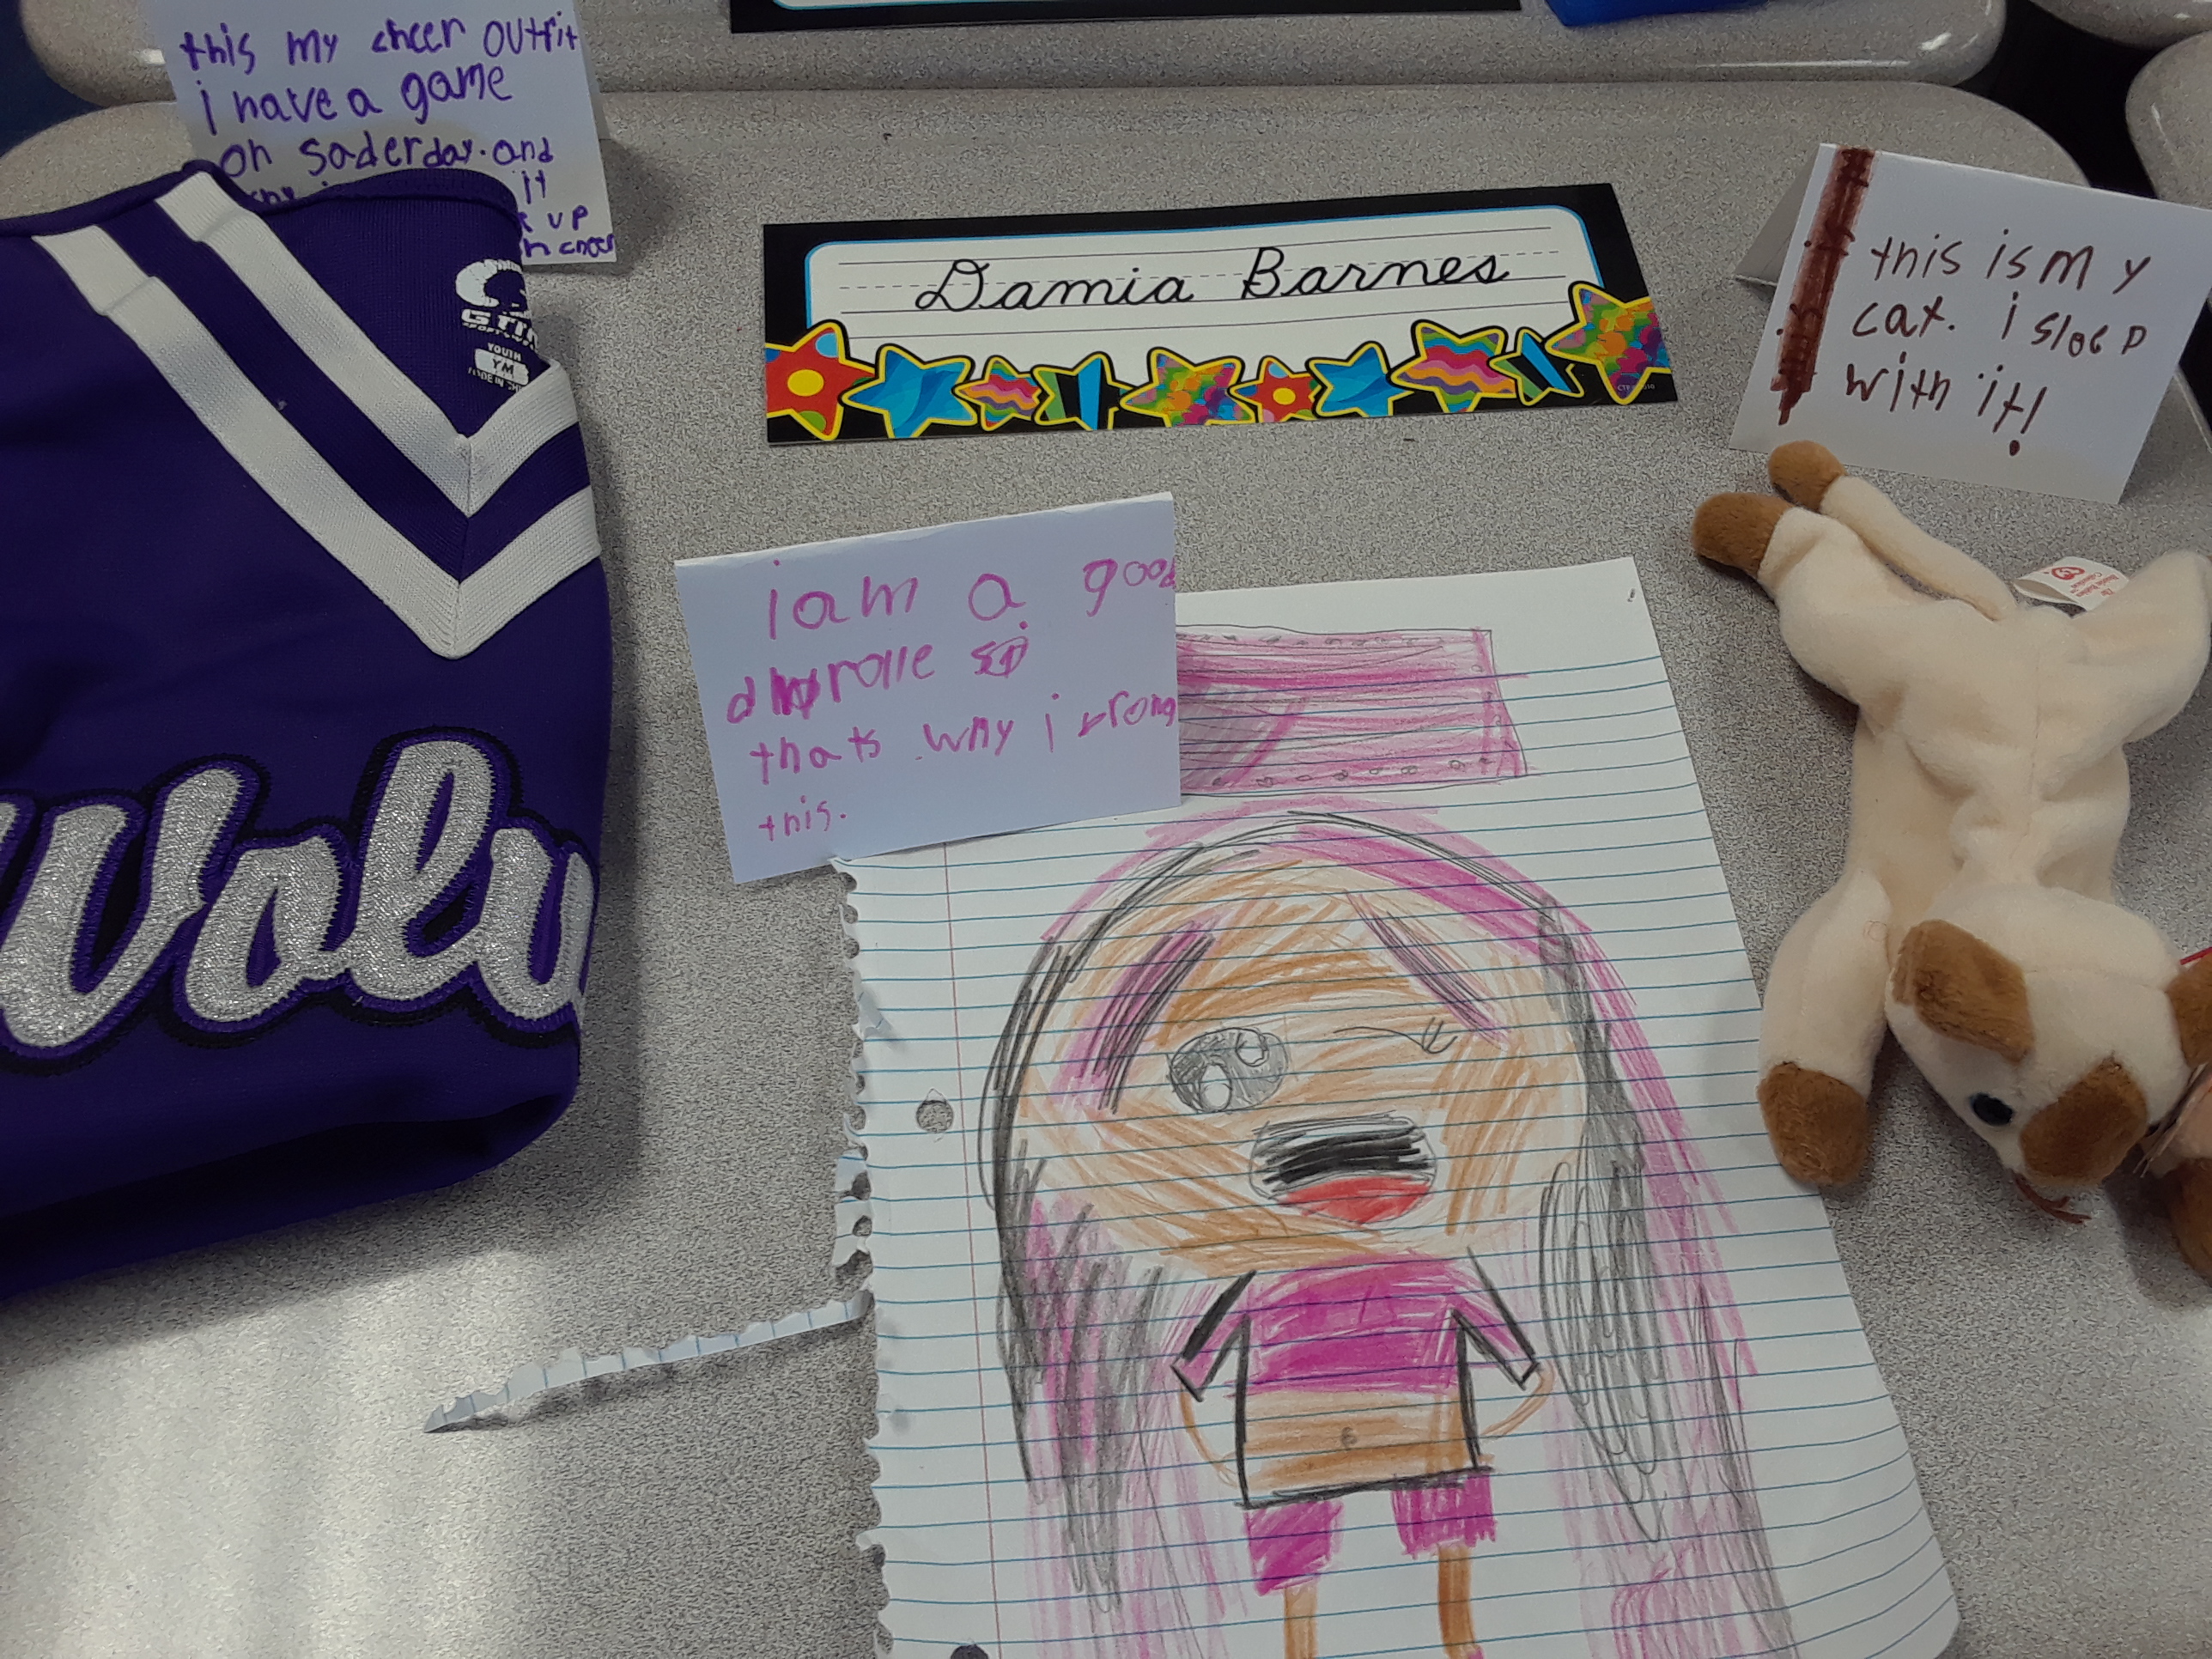
To help students learn more about each other at the beginning of the year, I hold a “Me Museum” event during the first week. Students are given a profile sheet (1/2 page) with a few questions to answer such as name, birthday, favorites, and goals. In addition, they are asked to bring in three items that represent who they are or what they like. On the sharing day, students create tent cards to explain the items and the importance. They set up their desk space with the profile sheet, objects, and tent cards. Then everyone walks around to look and read like one would in a museum. We have rules such as no touching and only positive comments. The principal and other teachers who work with my students are invited to pop in as well. I like to take a picture of every display and look back at them in more detail at a later time. Much of my focus is on managing behavior during the event, and it’s a lot of new info to absorb. I really want to recall these displays in future conversations with my students and photos is the best way for me. When it appears that the kids have had ample time to peruse, we have a whole-group conversation about similarities and eye-opening discoveries.
As part of our PBIS (positive behavioral interventions and supports) program, I have my students help create instructional posters for common classroom activities. During the discussion, I have a blank template up on the board. As individuals share their ideas, I ask for thumbs up/down feedback and add any content to the document. I enjoy listening to the students reason and even adjust wording to be more precise. One year my class decided to suggest the creation of new posters to address issues that had developed–miss use of disinfectant wipes and the pencil sharpener. What a great idea!
Arrrgh, mateys! Captain Multiply here. Arrr ye ready for a wee math review game? Well, come aboard me ship, The Array, and let the adventure commence! Captain Add has stolen me treasure. He thinks that addin’ is the only way to get the right answer. But we know better, don’t we, mateys! Your mission is to follow the clues on me map and use your amazing multiplication skills to locate me treasure. If we find it, I shall share all of me spoils equally with you.
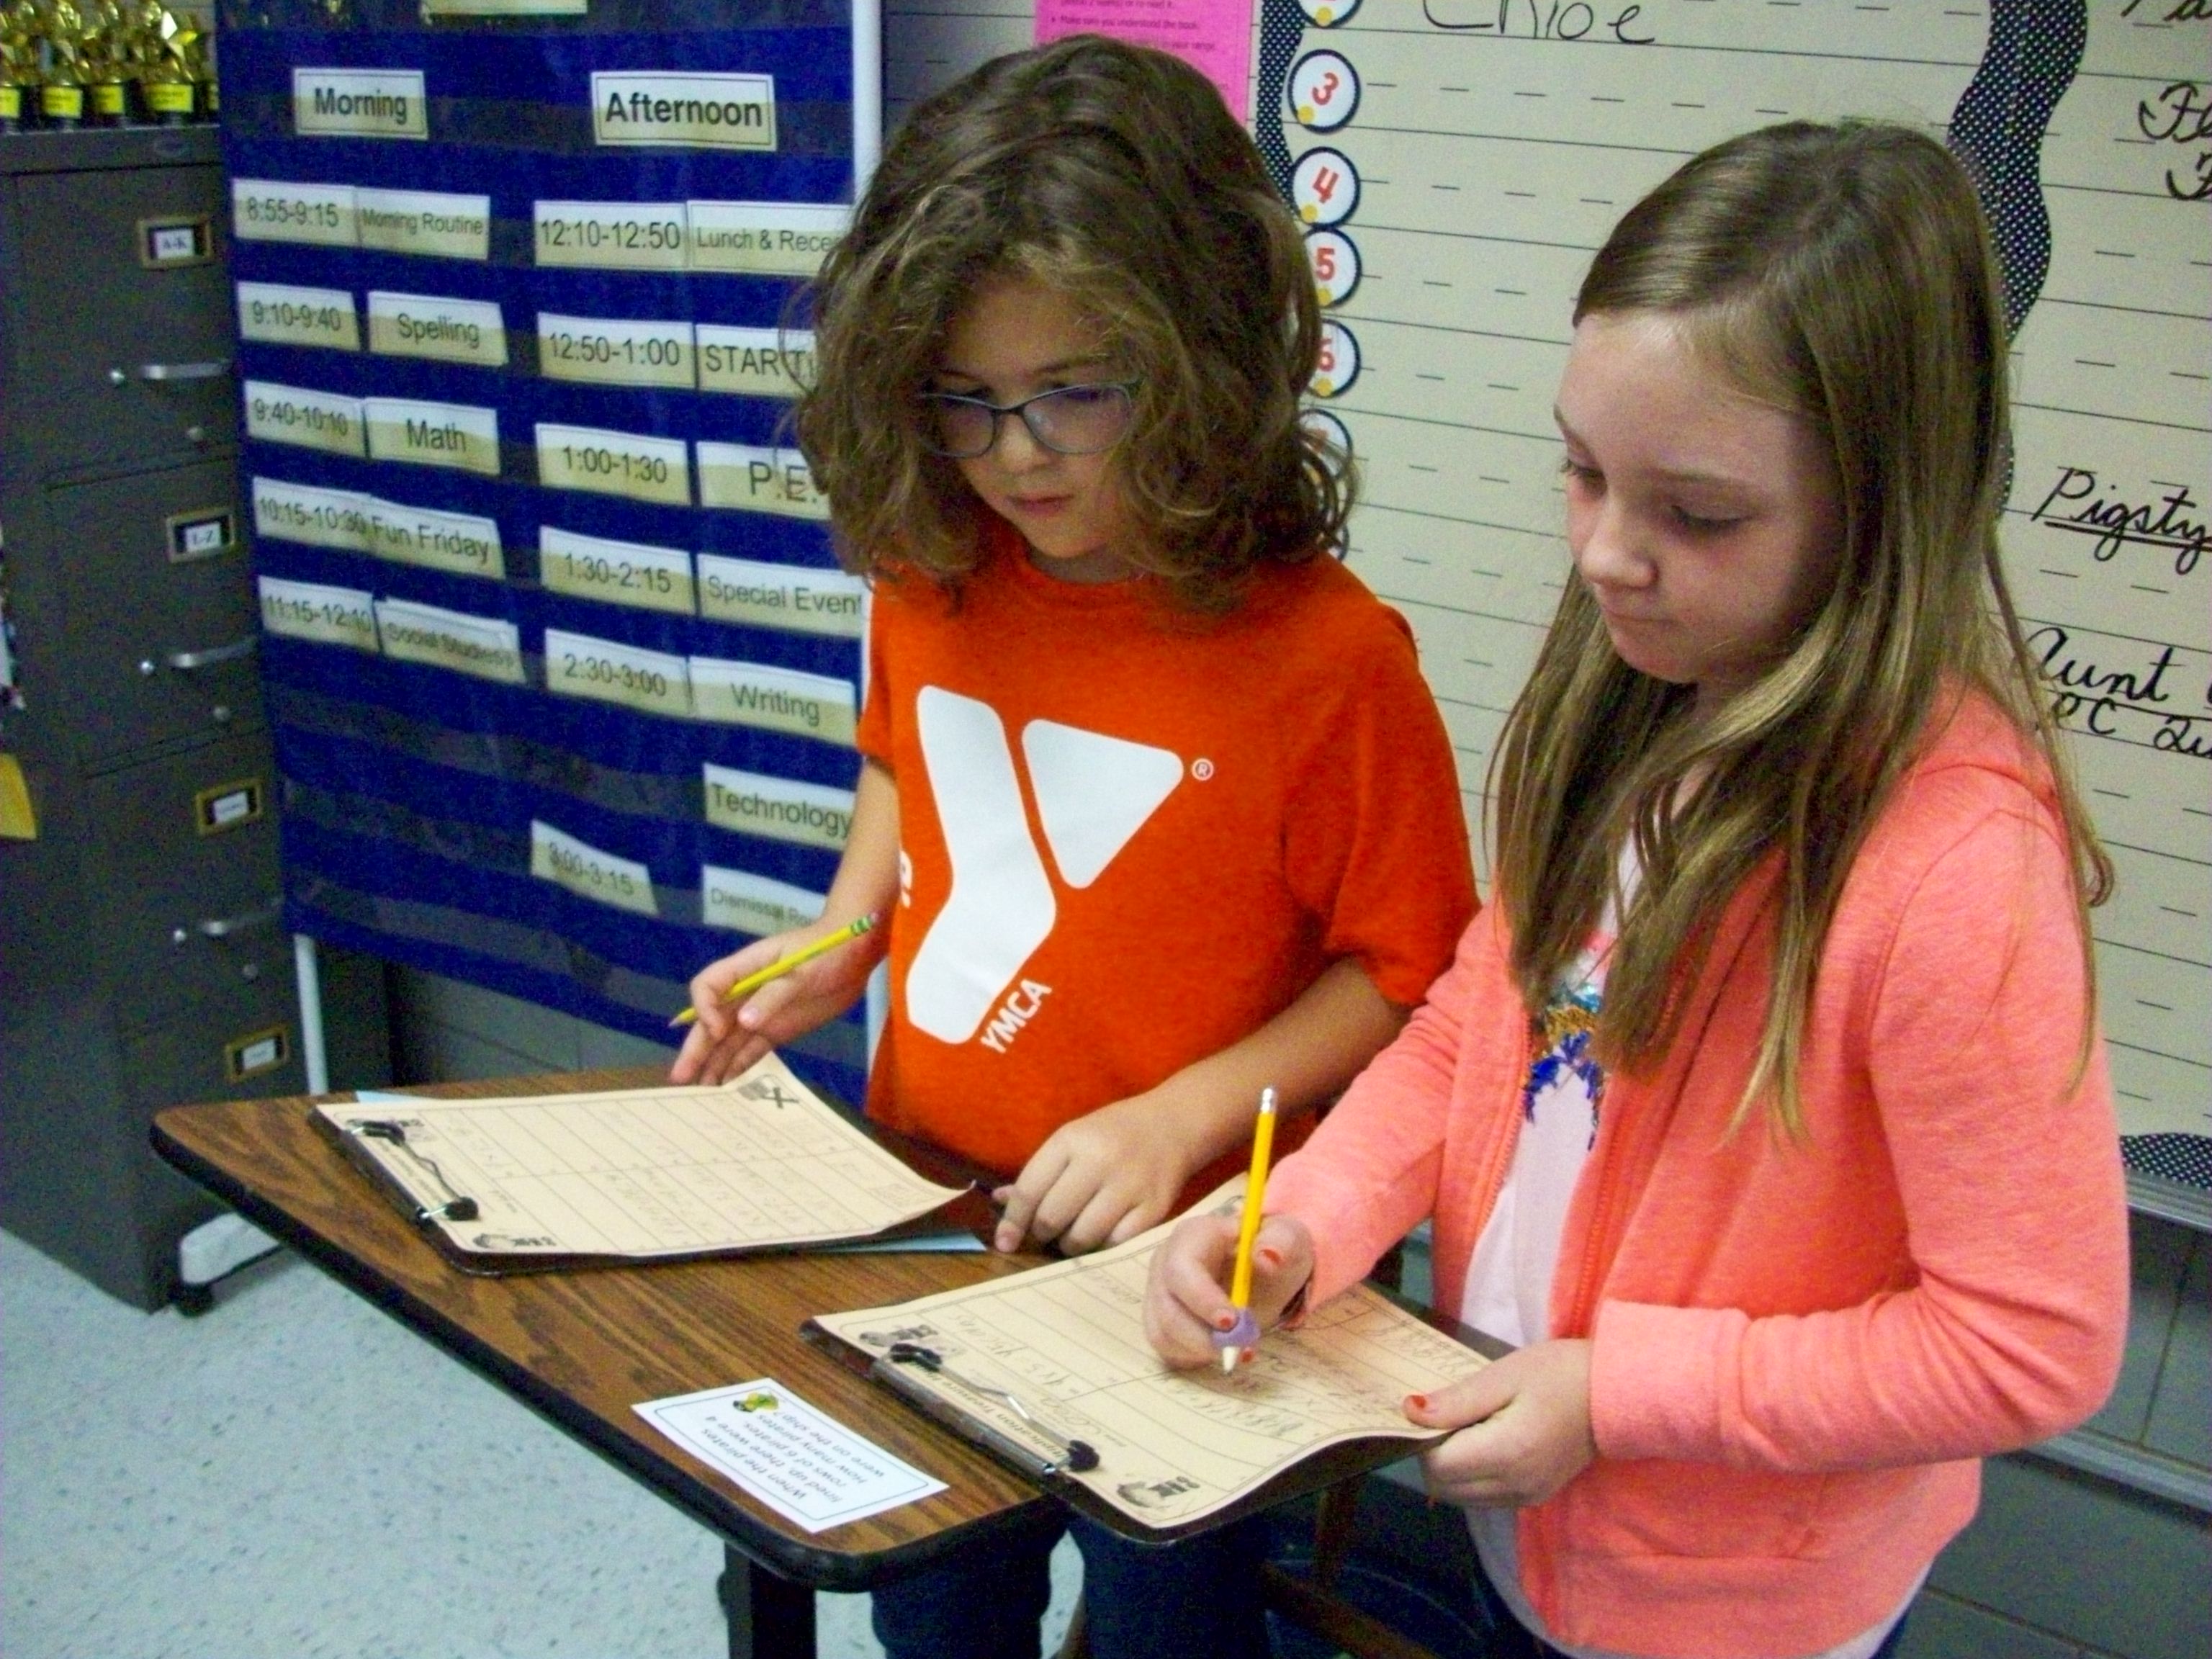
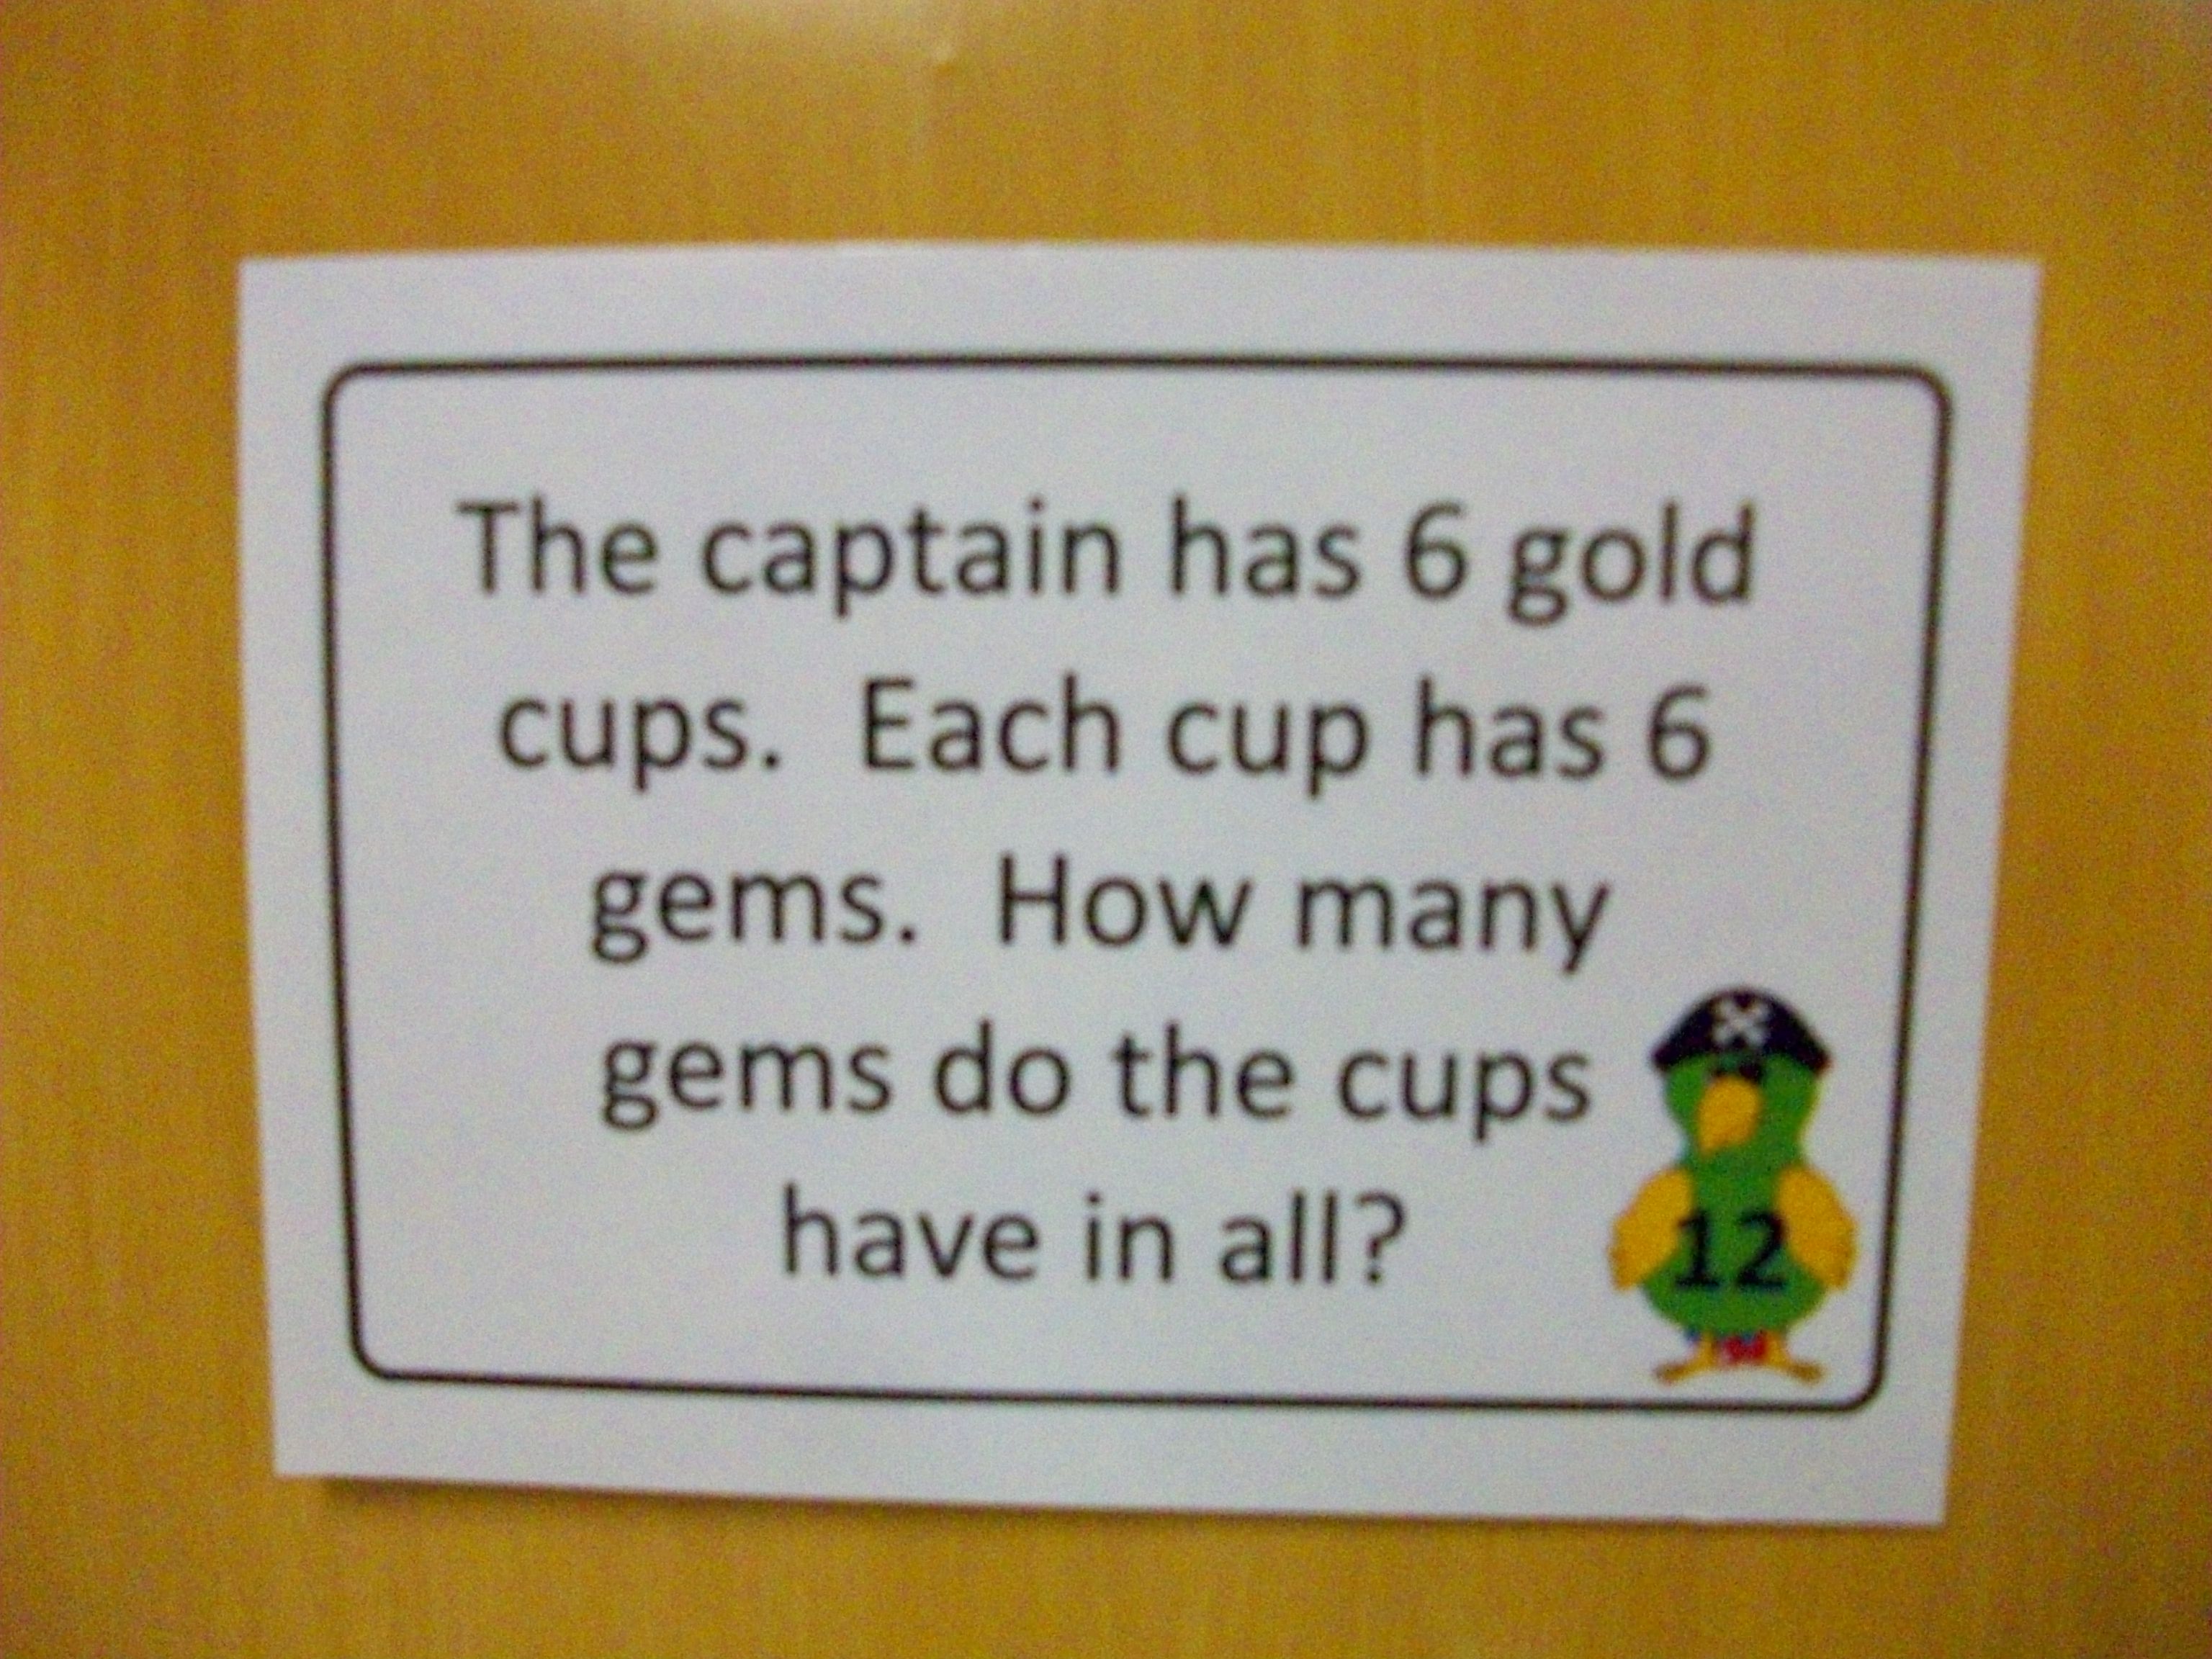
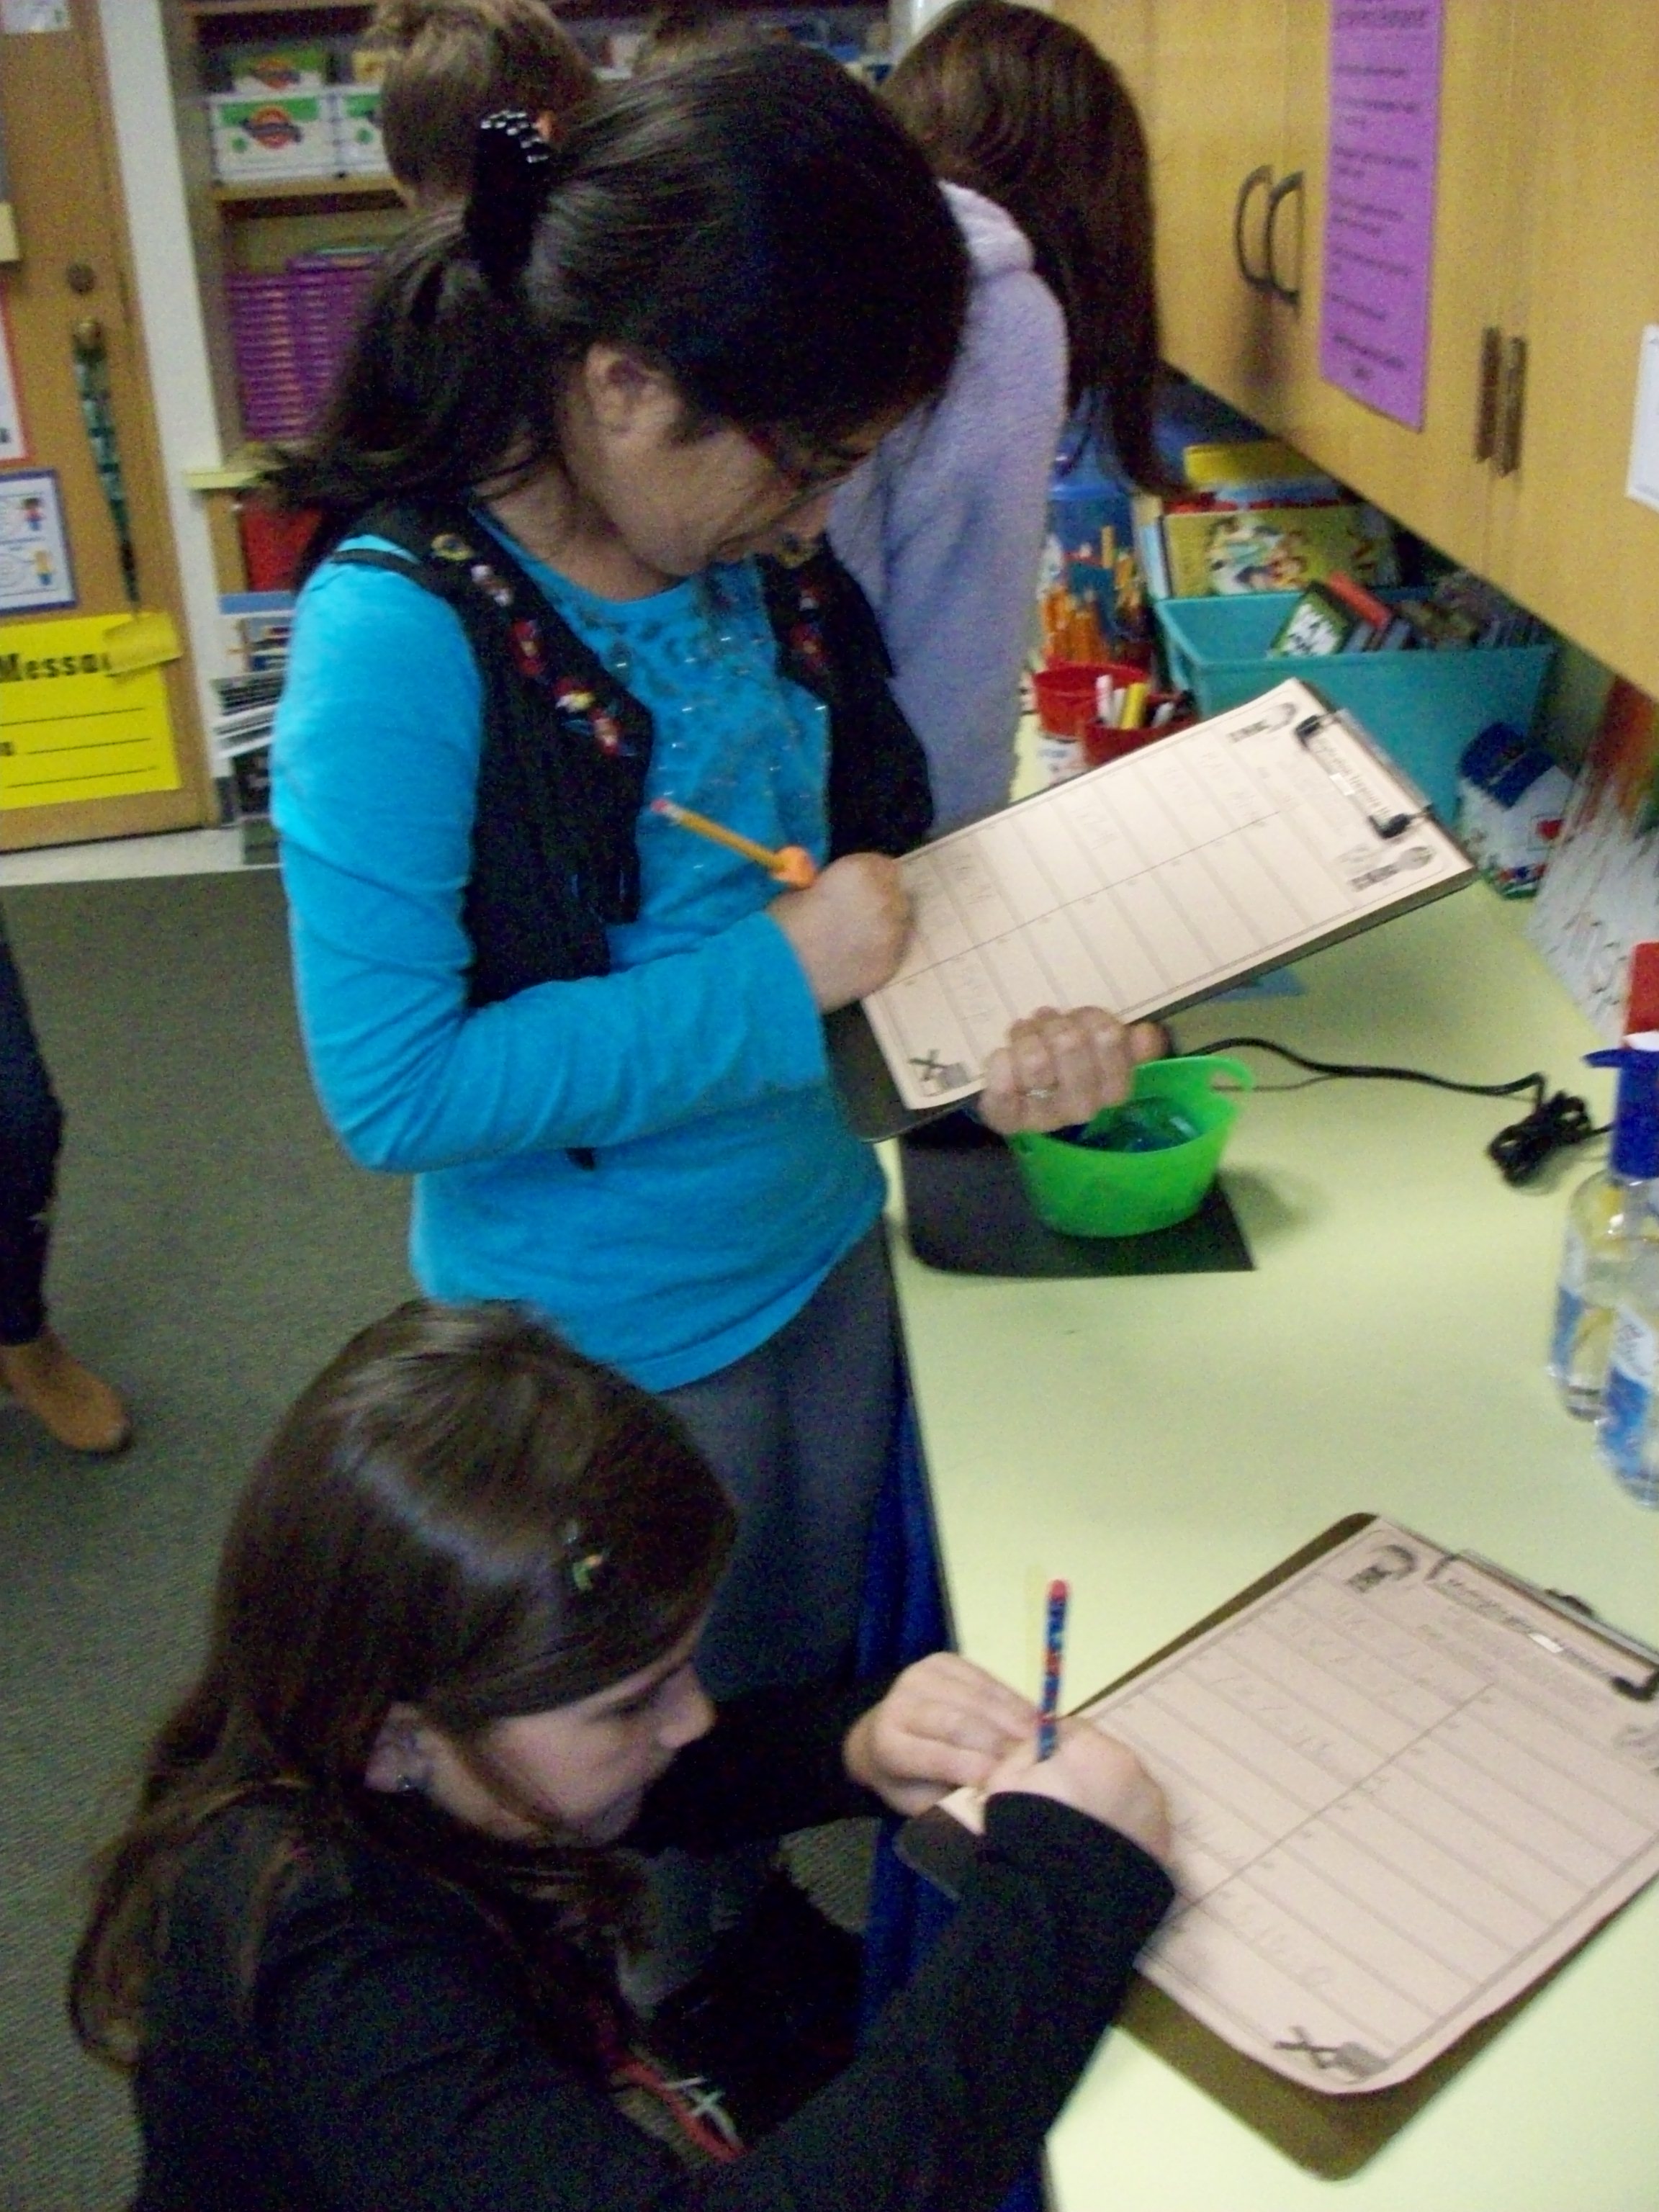
It’s room transformation time–mostly with costume, voice, music, thematic question cards and worksheets, and a REAL treasure. Ok, it’s chocolate covered gold coins. But the kids don’t know that when we set sail during this multiplication review game. After introducing the activity with my Irish pirate character, I show the students their “mates” for the challenge and call each team up to collect their clipboards with the “map” worksheet. Earlier in the day when the class is out (music, PE, or art), I tape up the 18 “clues” (which are multiplication questions) at various locations around the room. The cards include X story problems, repeated addition equations, and drawn arrays. Teams record their responses on the map. When they have completed all 18, they can check with me for verification. Any incorrect answers can be fixed as other teams finish up. Groups that have all correct responses are given the challenge to support another team (not give answers, but suggest strategies). Once everyone is done and returns to the ship (their seats), I ask the crew for information on the location of the stolen treasure. I always place the final #18 card where the chest is buried, usually my lidded ottoman or closet. When I have a team “dig it up” for us, the whole class is surprised to learn that there is an actual chest with gold coins. I have a sign that reveals there are 100 (or another multiple for the number of students that year), so they can have the extra challenge of dividing that number equally. 100 / 25 = 4 gold coins each. The sweet reward at the conclusion of this activity is three-fold: candy, knowledge, and confidence.
A complex mathematical concept when described, but completely understandable with hands-on, immersive learning. The distributive property of multiplication!
Definition: the property that terms in an expression may be expanded in a particular way to form an equivalent expression (www.dictionary.com)
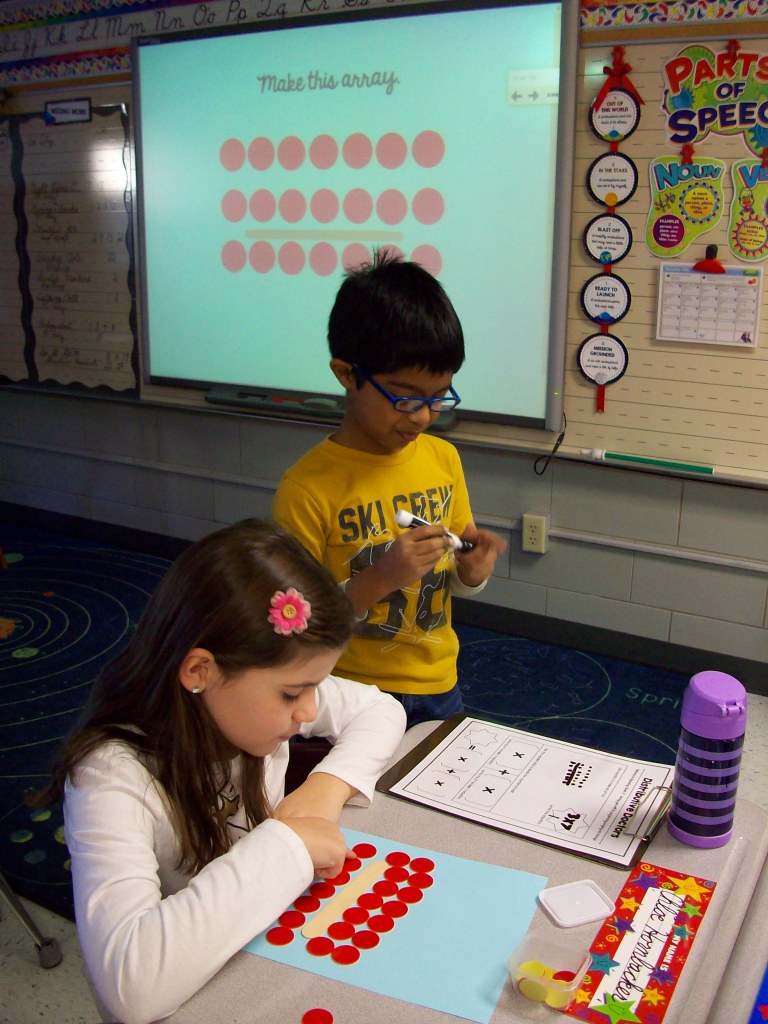
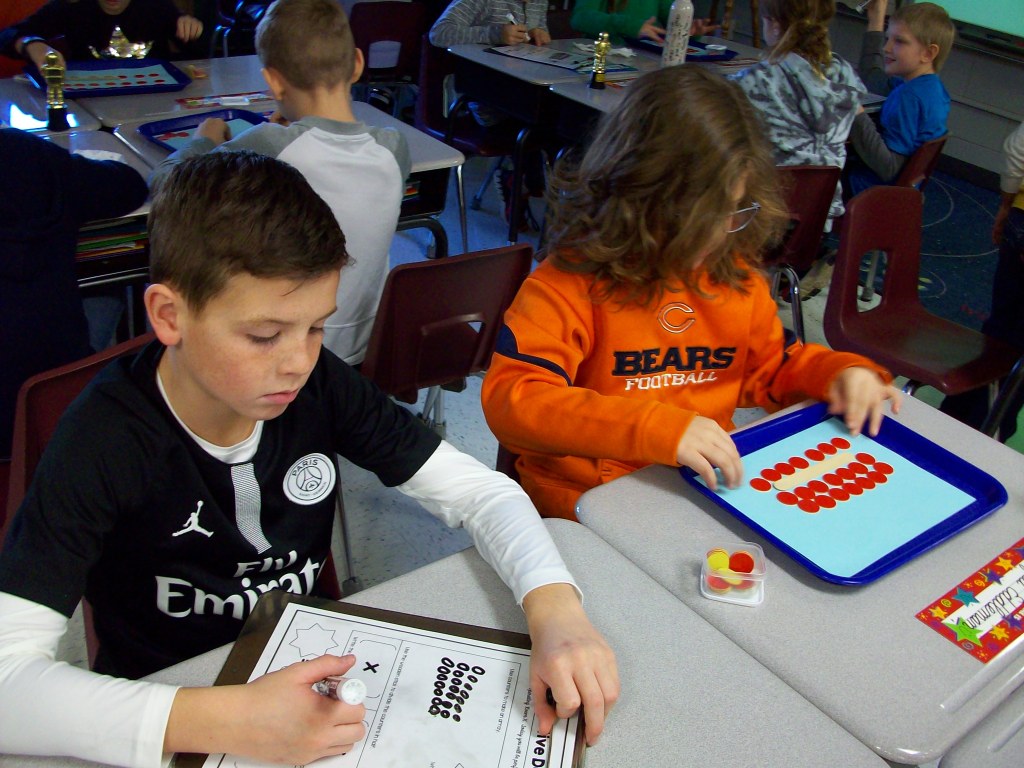
To third graders (and most adults), that definition is mind boggling. Enter Dr. ________________ (insert your name here). Each year I arrange to have this hour-long activity take place after a classroom break. Often I set it up when the kids are in a special (art, music, PE), because I need about 30 minutes to change the classroom into a hospital operating room and I want it all to be a surprise. The day before I will gather the needed materials (trays, counters, jumbo craft sticks, small paper plates, Q-tips, red tempera paint, tissues, dry erase makers, laminated practice sheets, and copied worksheets . . . plus my white lab coat, stethoscope, Dr. name tag, and “Operating Room X” sign for the classroom door). When the kids are gone, I rearrange their desks into three large OR table groups. The trays are set with the needed supplies for elbow partners (resident buddies) to share as they work together in their training. I pick the class up in my costume, so they are already reeling with curiosity. When we reach the classroom entrance, I stand next to the operating room sign and greet each student with “Good morning, Dr. Kirk” or “Welcome to the OR, Dr. Smith.” I use a prepared SMART Notebook file with “case studies” of patients that have a diagnosis (7 X 8). I ask for their advice on which operation to perform to “cure” the patient. Using the jumbo craft stick as a scalpel, I model how to cut apart the large array into two smaller, more manageable arrays (2 X 8 and 5 X 8) on our document camera. Once we do 3-4 examples on the board, they get the idea and are ready to try it with their partners. Now they can use some of the materials on their trays. I continue using the SMART Notebook file with patient profiles. The teams set up the scenario using the counters and discuss how to operate. The laminated sheet has the template __ X __ = (__ X __) + ( __ X __ ) so they can practice writing the larger array and showing how it can be broken up into two smaller arrays. After a few rounds of guided practice, they graduate to independent work using red tempera paint and Q-tips on the worksheet. This time I provide the “patient diagnosis” (full equations such as 6 X 7), which they dot with paint. Then they must decide where to “cut” (draw a line to separate it into two smaller arrays). Finally, students write the math equations to document their understanding of the property. Any “residents” that finish early and have “cured” all of their patients, are given the challenge of assisting any classmates who need more coaching.
This concept can be quite boring and confusing on its own. But turning the lesson into an experience really helped my students learn it and love it!
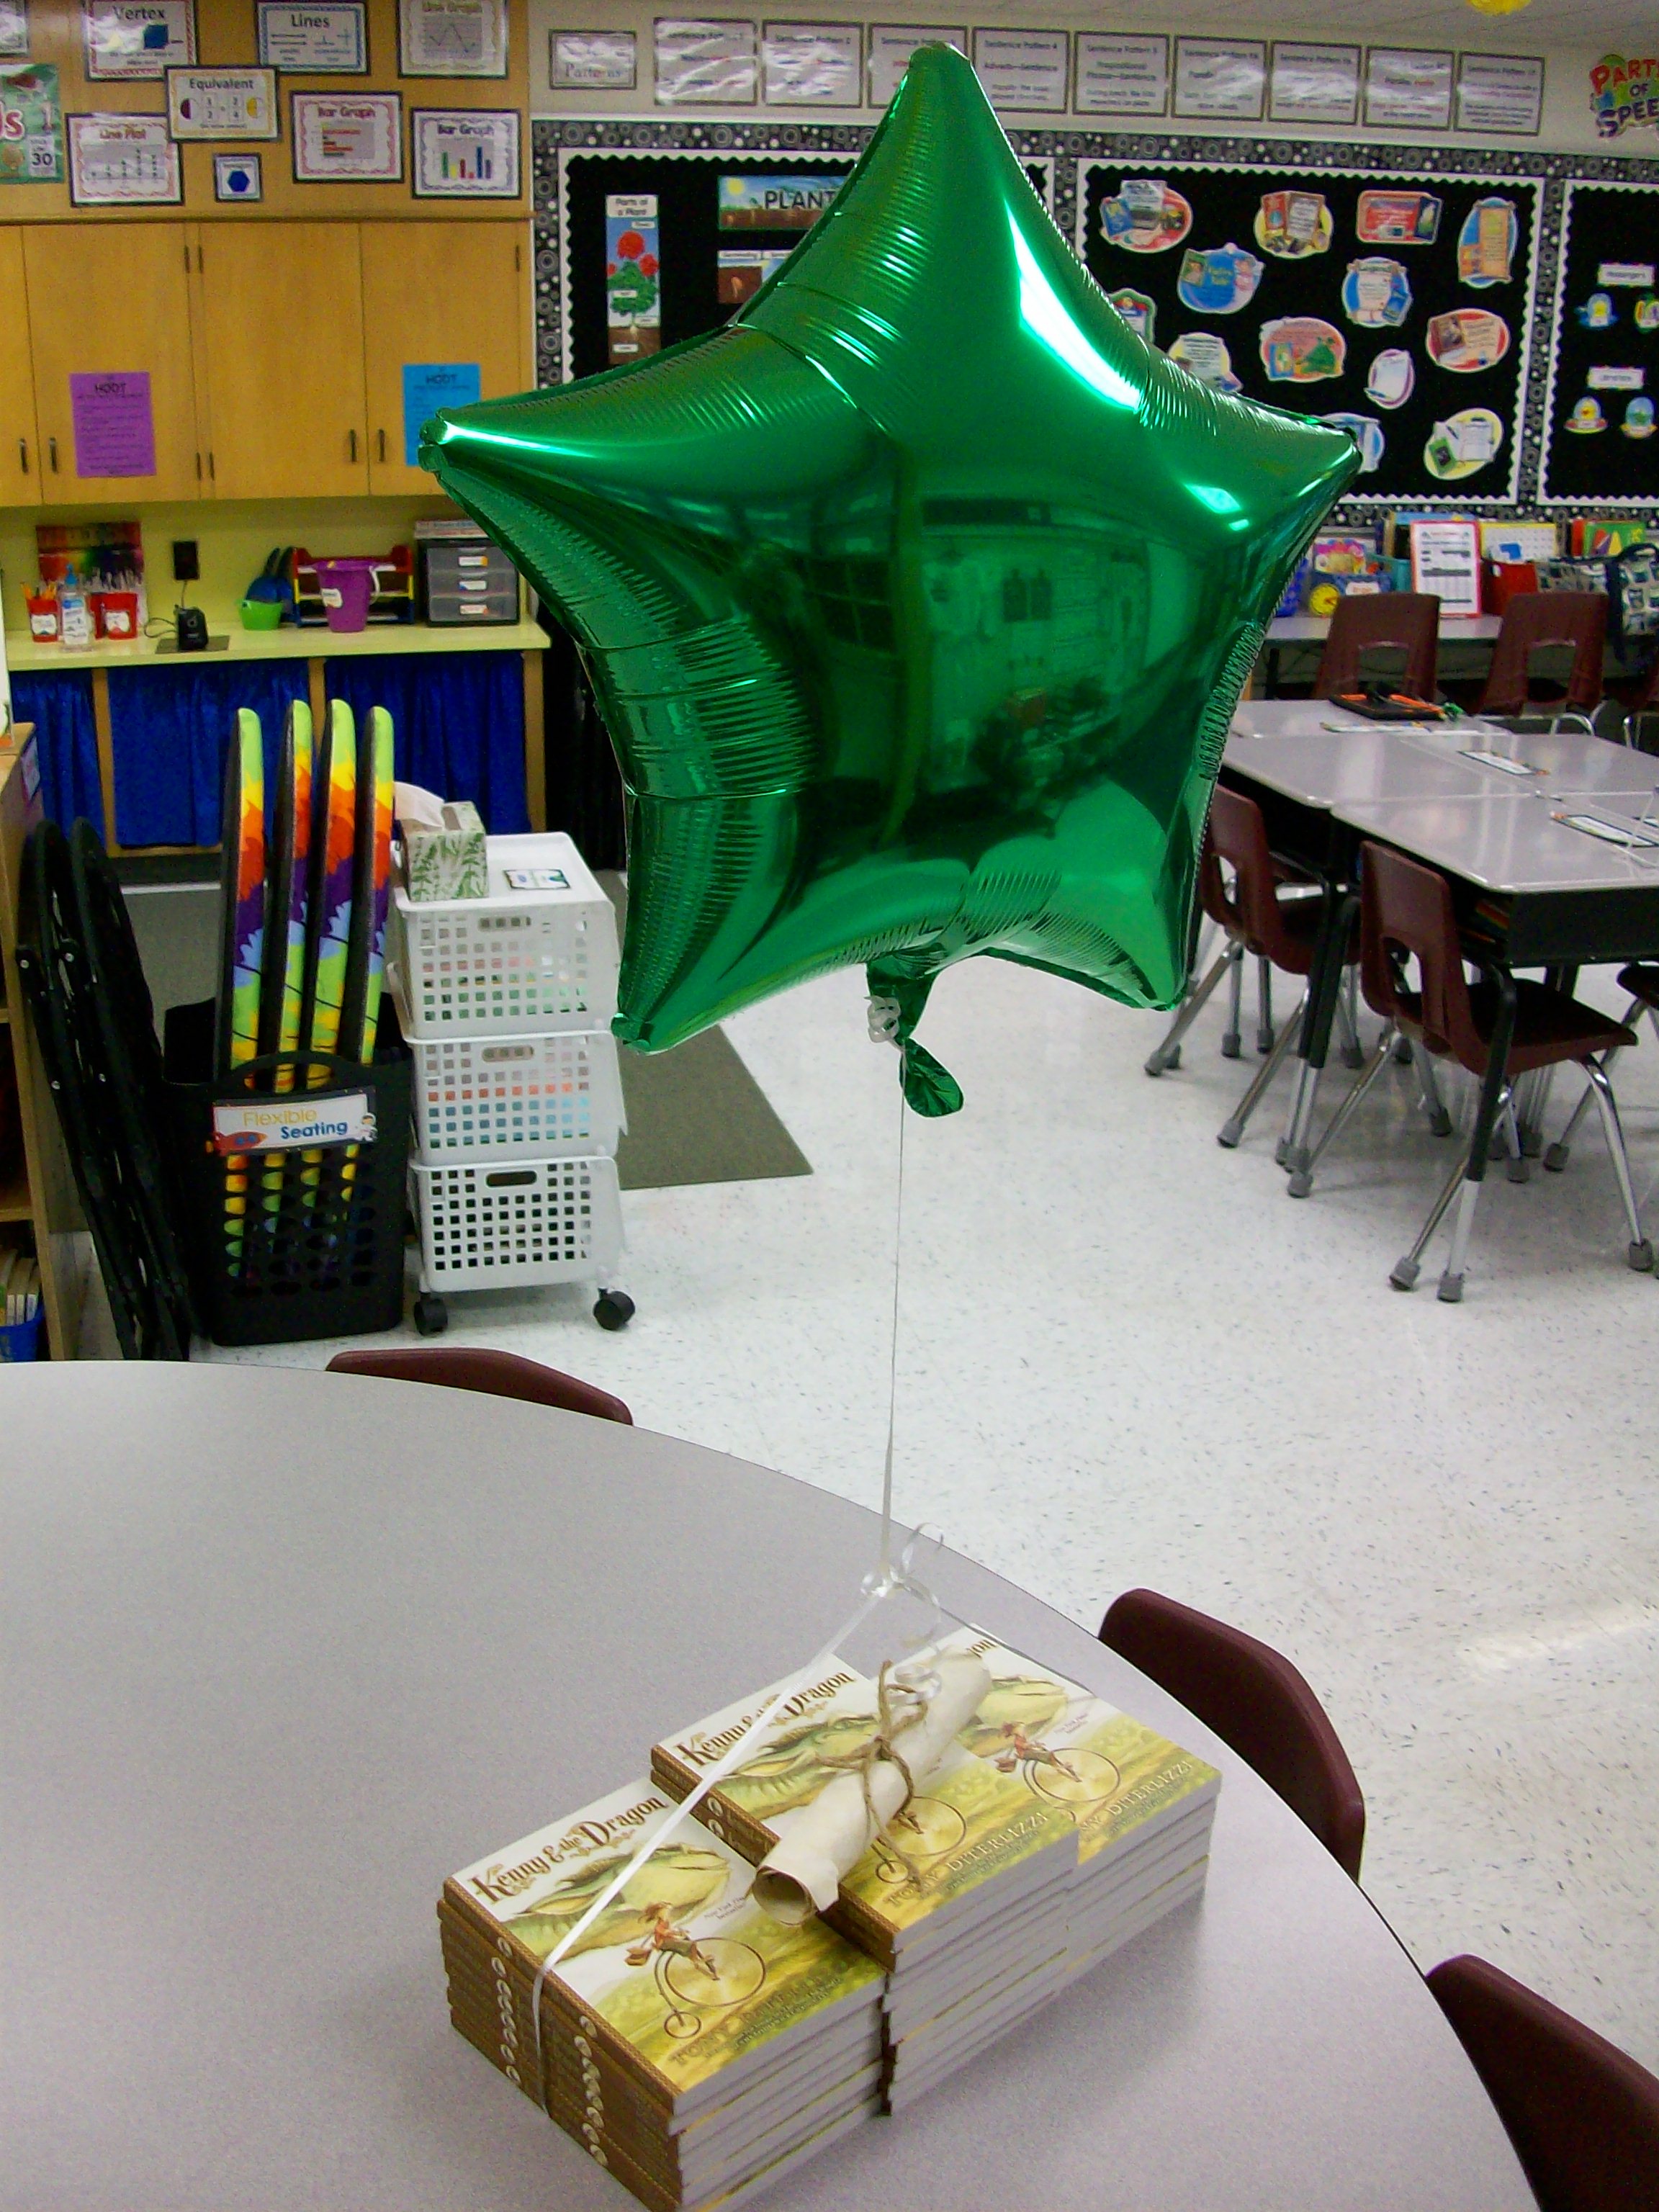
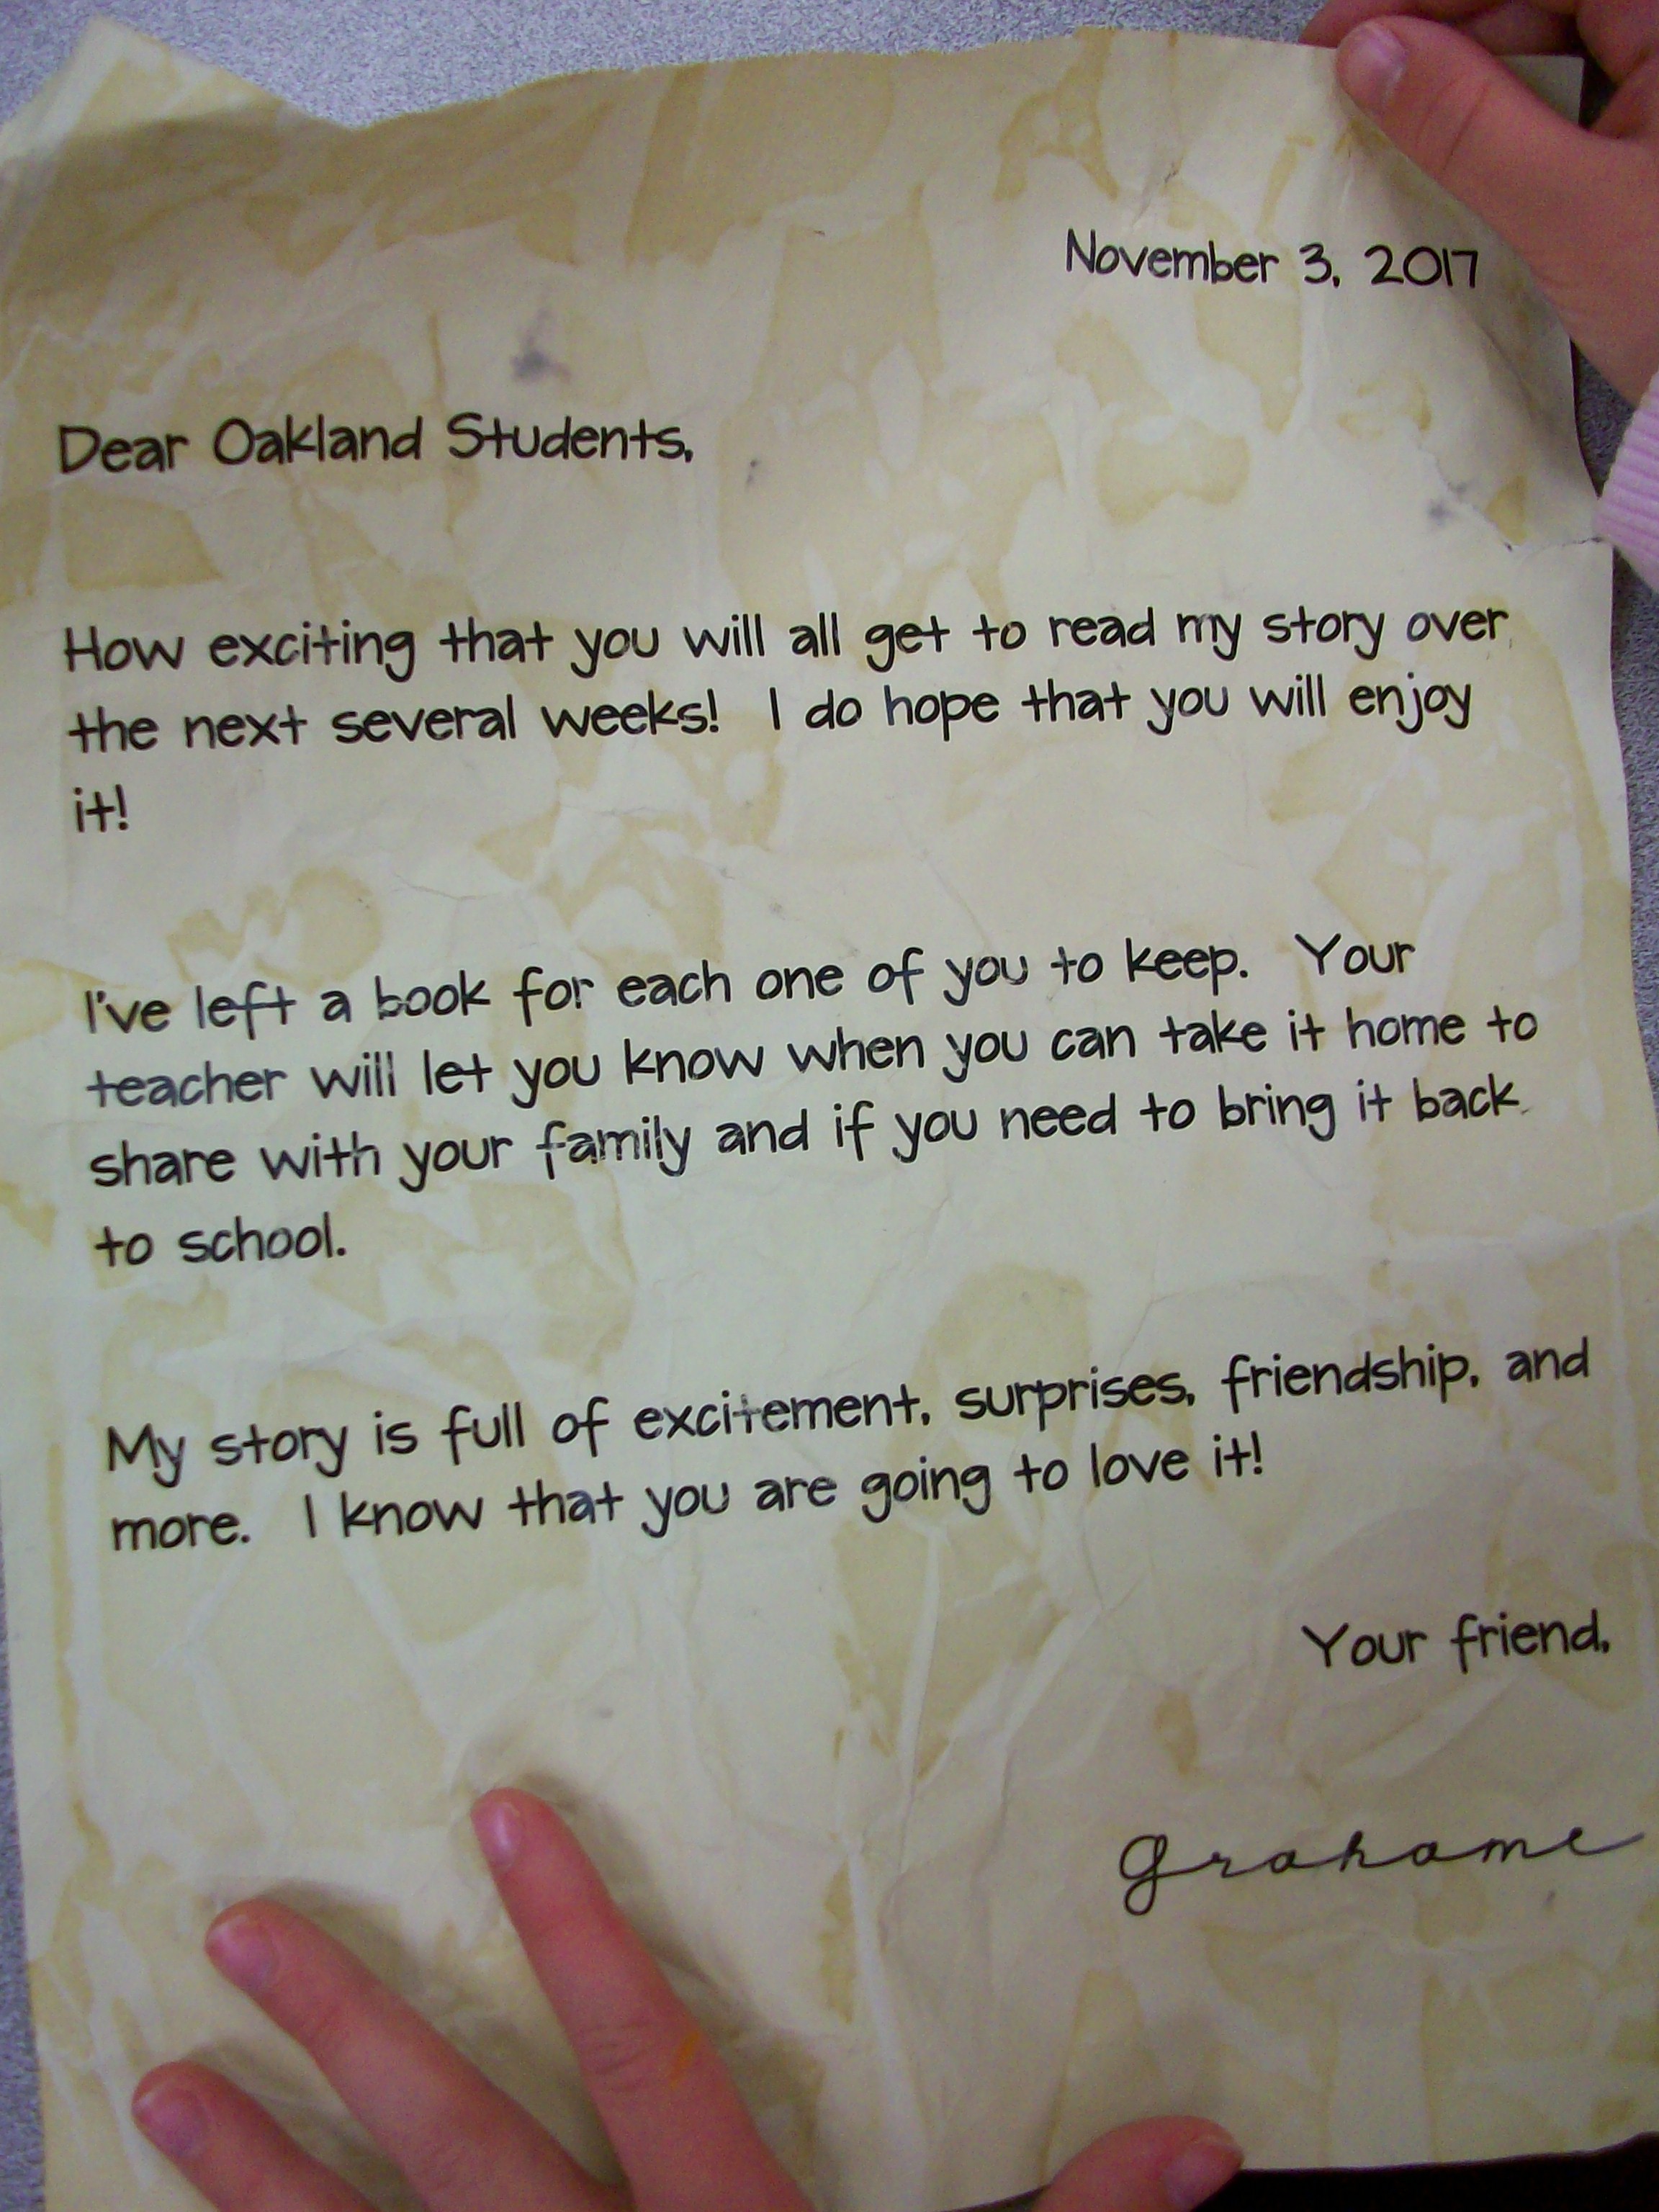
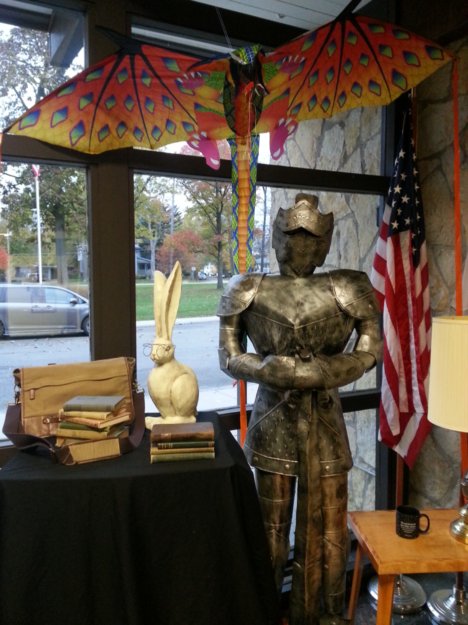
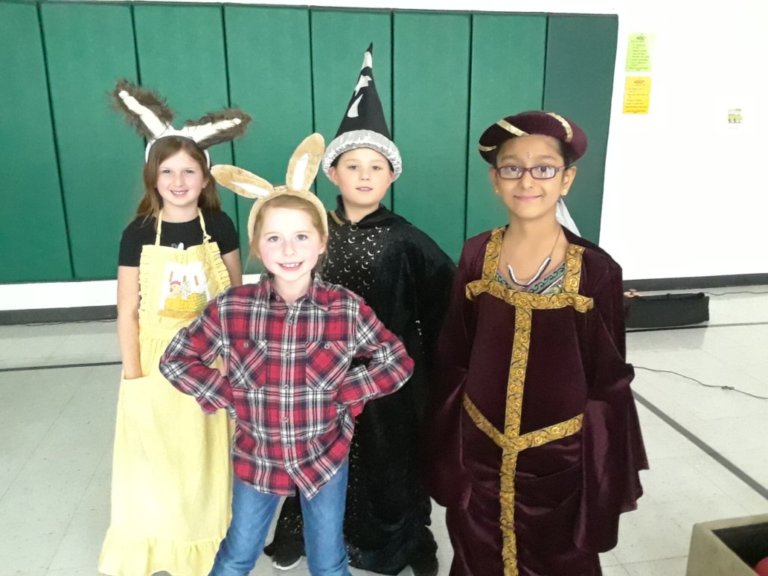
Our school has decided to embark on a “One Book, One School” reading adventure! Our novel is Kenny and the Dragon by Toni DiTerlizzi. As a member of this committee, I think we came up with several creative ideas to excite the students and families beginning with a kick-off assembly and book drop off. Our librarian read the first chapter to the entire school as I played the roll of the main character, Kenny the rabbit. (My ideas sound so good when I come up with them, but up in front of 500 people, I was wishing I had that same confidence.) We had borrowed an awesome dragon costume from the high school drama department, which snuggly fit our principal. He was game for it! During the assembly, he surprised the kids as Grahame, the dragon, and announced he had just left a special delivery for them in their classrooms. When the classes returned, they discovered he had left a huge stack of novels, one for each kid, and special scroll letter.
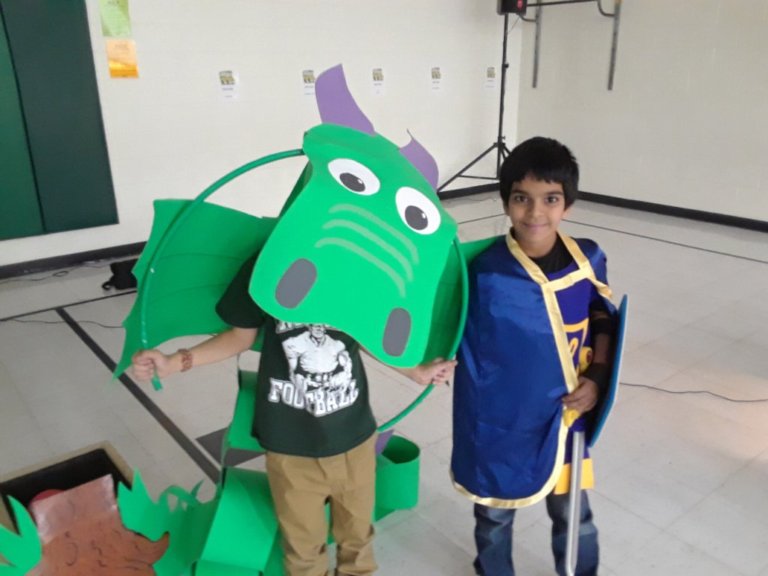
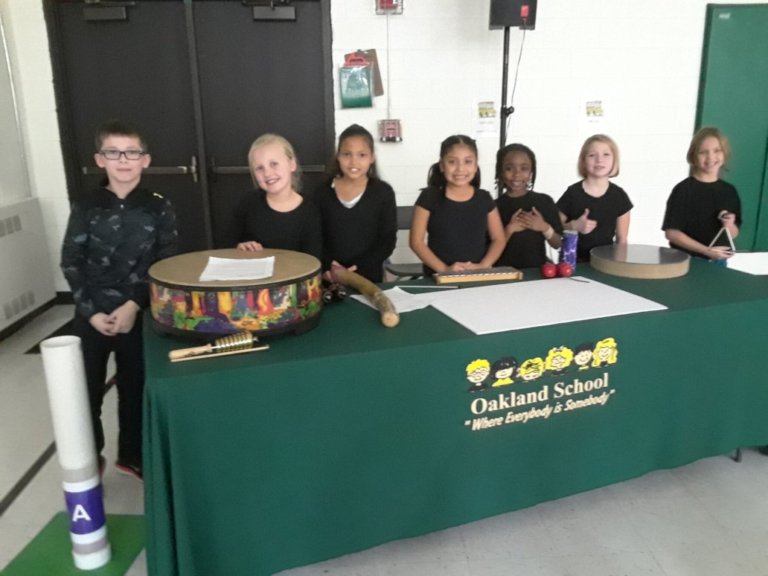
The OSOB committee also set up a little display in the lobby, created daily trivia questions and weekly trivia videos featuring virtual backgrounds from the novel, and centered our annual fall book fair around the theme of knights and dragons to match the story. As we wrapped up the novel, I enlisted my students to perform a readers’ theatre production of the final two chapters. I made a script, cast the parts, and gathered/created costumes and props. Our music teacher helped me match instruments to characters so that all 28 students would have a role in the performance. It was impressive! And I’m excited to see what we conjure up for next year’s OSOB event!
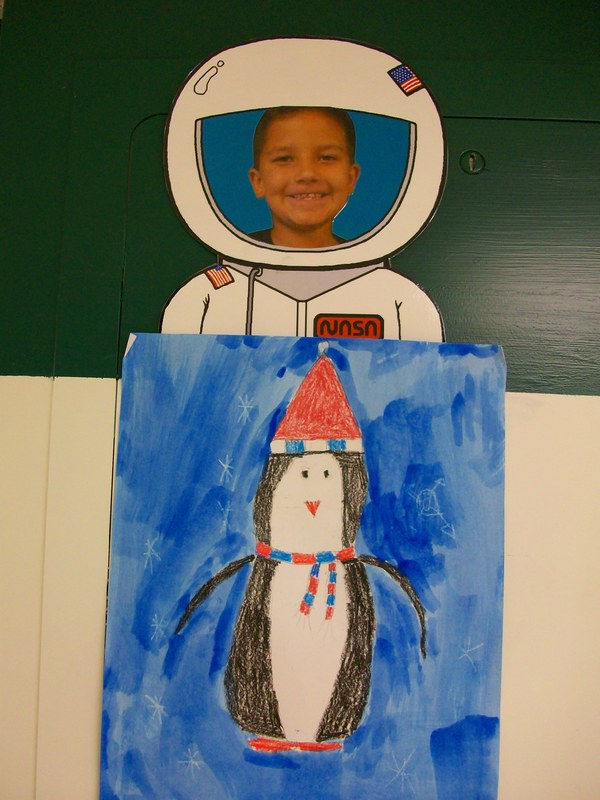
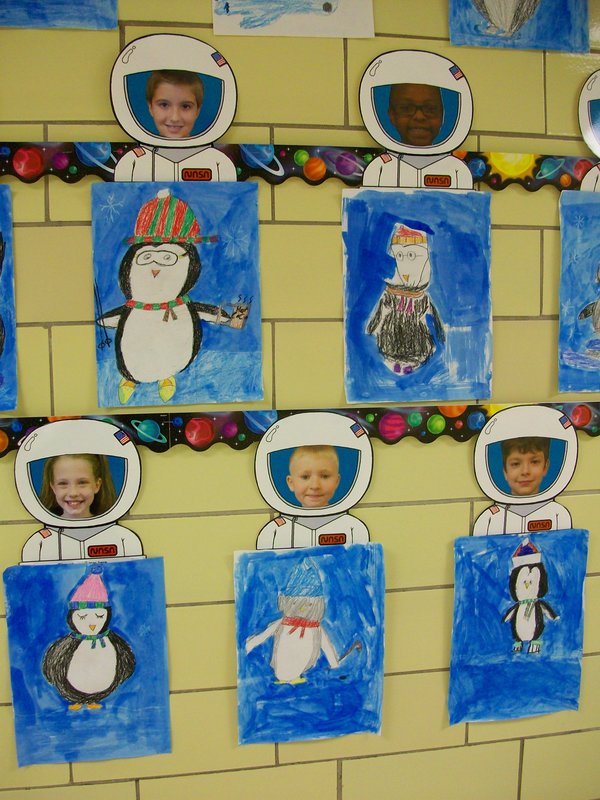
Listening skills + mystery drawing = art! These penguins are just adorable and truly reflect each student’s unique personality. It began as a directed drawing activity. The students didn’t know the final product would be this Antarctic bird. They had to listen to my directions (such as draw a large oval in the bottom half of your sheet or draw a triangle on top of the circle) and sketch with pencil. Eventually, they figured out that we were creating penguins. They had extra time to add accessories like a scarf and mittens. A few students included ice skates, glasses, etc. They colored using crayon and placed several snowflakes in the negative space. Finally, we used blue watercolor pain to create the wintery background and reveal the falling snow. After a night under our heavy dictionaries (so many uses), they were ready to display in the hall!
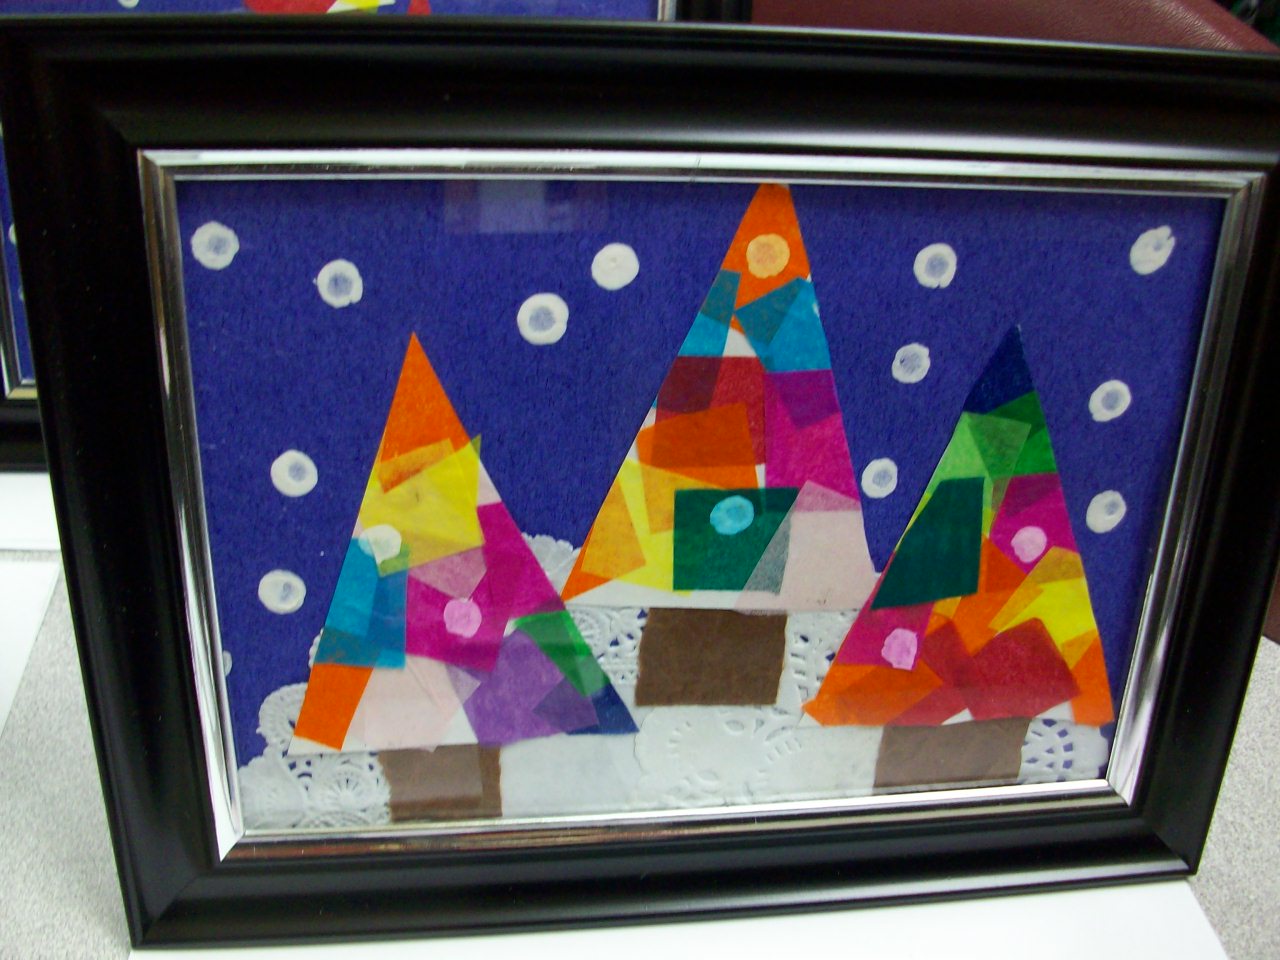
For our family gift, I guide my students in creating these collage winter scenes. Since there are a variety of religions represented in my classroom, I wanted to find something that wasn’t focused on Christmas. Even families that don’t celebrate any holidays can appreciate this craft. We start with making the blue watercolor background on white cardstock. As they dry, students use overlapping tissue paper squares (glue stick) on a large trapezoid shape of white construction paper that we later cut into the three trees. Torn and crumbled brown butcher paper makes the textured trunks. A small and mini doily cut in half make the snowy hills. And we finish off the collage with Q-tip dots of white tempera paint for the snowflakes. I prefer the kids use a glue stick rather than goopy glue on the construction. After a night under some heavy dictionaries, I frame each one ($1 each at The Dollar Tree). The students use a silver Sharpie marker to sign and date their works of art on the black cardboard frame backing. (Parents will want to remember the year and grade when looking at it in years to come.) The kids also wrap the gifts and create cards before taking them home the week before winter break. Colorful. Creative. Cute.
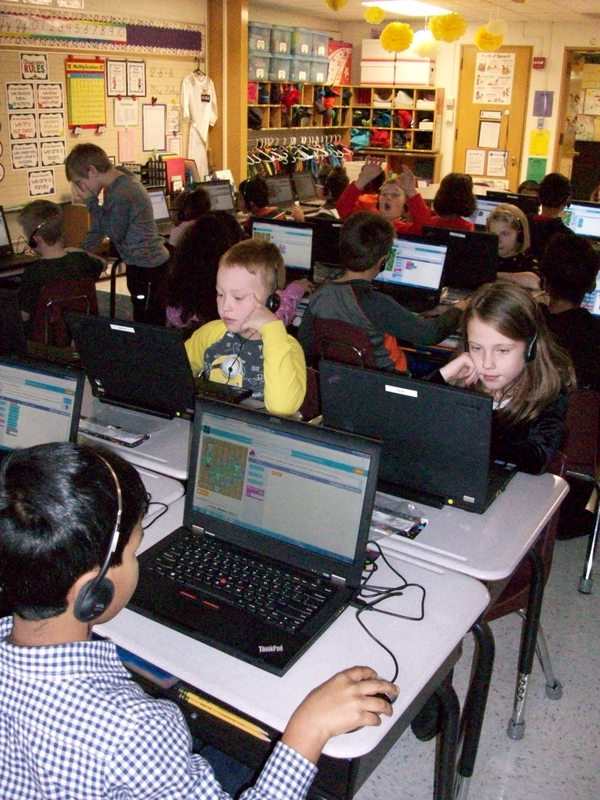
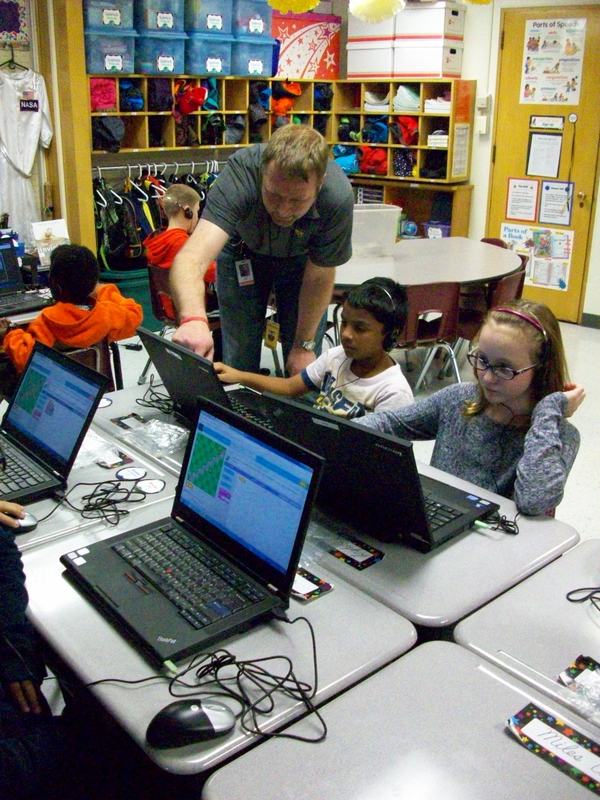
Don’t be afraid of coding! I was. So I enlisted the help of a co-worker’s husband who does it for a living. He was great at helping us ALL get our feet wet! During “Hour of Code” week, Mr. H came to our classroom and explained what coding is and how we use it every day. The www.hourofcode.com website was perfect for the kids to explore coding in a video-game style format. The coding blocks and trials allowed the kids to take chances and learn from any mistakes. They took on each leveled challenge and persevered through any obstacles by trying again or asking for help. No one gave up, pouted, or cried . . . not even me! It was a great experience for everyone. And we don’t need to wait until next December’s “Hour of Code” week to do it again. We can explore coding anytime, because we know it’s nothing to be afraid about!