Link the site http://online-stopwatch.com to your presentation pages (or bookmark) for quick access to timers. If you want students to focus on work or step away from the screen to take a break, use the less exciting ones. I have used this resources for many, many years. What a great visual for students to manage their work time. Be sure to check your volume level in advance so you don’t scare the pants off of the kids!
Remote Learning
Remote Learning – Breakout Rooms as a Quiet Space
Breakout rooms are great for small group discussions. But what about using them for individual students. A large whole-class virutal meeting is never truly silent and free from distraction. So how can students spend time reading or thinking in that setting? Why not put each student in an individual breakout room for that 5-20 minutes of time? Then everyone can read to self, practice fact fluency, watch a video (hopefully without streaming issues), and the like. Of course, it is important for for students to be supervised at home or generally responsible. As the teacher, you can pop into each breakout room to check in on kids and have individual conferences. Keep them on their toes by not saying ahead of time which kids you will meet with. If a student needs help or has a question while in the solo setting, he/she can use the digital “raise hand” feature to summon the teacher.
Remote Learning – Checklists
What to do before/after class or during breaks must be directly taught and reinforced daily. If there are options, include a list with the most important at the top. You can also divide a checklist into MUST DO and MAY DO categories. Whether your list is a bulleted (options) or consists of check boxes (required tasks), be sure to include the time frame (10 minutes, 2:30-3:00, return at 10:15) as well as other expectations. Keep it simple. Keep it consistent. Review often if not daily.
Remote Learning – Preview the Day
If you preview your plan for the synchronous day, students will have fewer questions and feel more comfortable. But keep it simple. Kids just want to know the gist. This is the Google Slide I present during our morning meeting. From 9:00-9:15 I greet the students, share reminders, do check-ins, integrate digital citizenship, and present our social-emotional curriculum. As you know, I color code everything, so on this agenda page math is outlined in blue, reading is green, and writing is yellow just like their physical materials and my lesson slides. I think the colors help student categorize and organize. The stars represent our 10-minute breaks. Our schedule is consistent every day, though there is an occassional special event that requires some adjustments. Simple and consistent is key, but flexibility is definiitely present.
Remote Learning – Daily Agenda
Keep your daily agenda simple and consistent, if possible. Having regular start and end times will be essential as many remote students will be independent in remembering and returning for sessions. Suggest they set an alarm or reminder on a phone, kitchen timer, or virtual assistant (Alexa, Siri) to be on time for afternoon sessions.
For my students, I laminated this chart, which is a general outline of our consistent daily schedule. Just before we ended our morning learning session, I would remind students if they needed to return for afternoon groups. They would use a dry-erase marker to circle reading 1:30-2:00 or math 2:00-2:30. It also had a short list of indepdent work with checkboxes. I liked that this allowed students to be independent and that it wasn’t digital so special grown-ups would be able to take a quick look at it to be informed about PM groups and work completion. At end end of the day, students could wipe it clean with a microfiber cloth I provided (or a tissue) and be ready for the next school day.
Remote Learning – Web Browser Tabs
A technology device works its best when the fewest amount of applications are running. So students who have a dozen websites open (some of which may be games or videos that strain the computer and pose possible distractions during instruction) could experience issues with their video call. Explain the importance of minimizing open applications. In my remote classroom, we use Google Chrome and students start the day with just our district Symbaloo and Google Classroom tabs. They are reminded to X out of any others such as the tab that launched our Zoom meeting. As our morning progresses, additional pages may be needed. But as we finish with those websites, students are instructed to close them.
To avoid the accidental closure of a needed tab, I teach students how to pin and bookmark sites as well as the difference in their uses. By right clicking on a website tab, the Pin option (push pin icon) keeps the site open. In fact, it removes the X completely. In order to close it now, the user must right click on the tab again and select Unpin to view the X. I highly encourage pinning a website when students are taking an assessment. Although some tasks may be autosaved and allow the student to pick up where they left off, pinning will help you avoid those scares. The Bookmark option (star icon) is used to collect often used sites in a list. Those appear in a bar along the top of your browser and additional ones can be located by clicking on the >> at the end of the row. Users can rename bookmarked sites by right clicking and editing or rearrange them by clicking the title and dragging it to a new spot on the bar.
Remote Learning – Welcome & Prep
Joining a virtual meeting always gives me a little bit of jitters. It’s the unknown. The awkward silence. The repeated directions. The waiting. It can be agitating. And I want to be calm, ready to learn when I join a meeting. While attending an online summer class, one instructor gave me a few ideas that I immediately knew I was going to use with my students. First, a template page with written welcome and directions. Second, a task to reflect on current feelings. Third, music. The name of the course was “Brain-based Learning,” go figure . . . she was using brain research from the moment we joined the call.
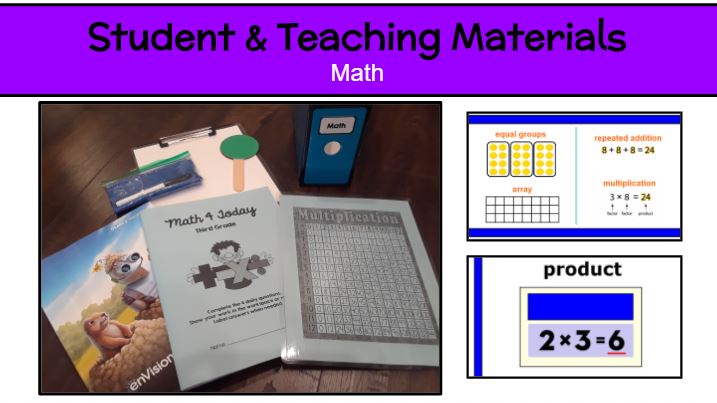
From day one, I put up a welcome page for students to see as they entered my meeting. I also had my Amazon Music “Mrs. Foley’s Playlist” on. Part of the reason for music is to give the brain something nice to listen to, but also it gave the kids an chance to check/adjust their sound. My page gave reminders about materials needed. In the chat I asked students to share a weekend highlight, describe how they are feeling in 2 words, set a daily goal, review a skill from a previous lesson (type a multiple of 9 fact with the product), etc.
This gave me time to take silent attendance and assist students with tech issues. The others weren’t bored or annoyed (hopefully) during this time. Instead, they were preparing their work space and selves for learning. Plus, it was a daily opportunity for community building because many times the chat questions were personal. The entire “welcome and prep” time is the five minutes before the official start time, so no time is lost, but A LOT of time is gained. We begin right at 9:00 (or 9:01) and have a smooth ride!
Remote Learning – Additional Tools
Communication Paddles
During your remote lessons, do you find it’s difficult to know if a student is volunteering. A raised hand is easy to miss. Avoid the confusion and wasted time by creating two-sided red/green communication paddles for each student. I laminated red and green cardstock circles, taped a jumbo popsicle stick onto one circle, then used a strong tape rolled into cylinders to sandwich on the other circle. Prepping these communication tools in advance will greatly help your students and the flow of your lessons. Be deliberate in using the yes/no paddle. Say, “Paddles ready!” and then ask your yes/no question. Scan your meeting grid to quickly and clearly see responses.
DIY Dry-Erase Boards
If you aren’t fortunate enough to have individual dry-erase boards for every student, make your own! It’s as simple as laminating a sheet of white cardstock. I used my personal laminator and thick laminating sheets to create mine. I love the strength and rounded corners. I also included a thin dry-erase marker and microfiber cloth to use as an eraser. Students can place the laminated sheet on the clipboard I provided for extra support if needed.
Remote Learning – Funding Needs
Teachers often spend their own money on supplies. Whether you are teaching in-person or remotely, it’s likely you will need additional funds to purchase more individual student materials. Sharing in class is not much of an option right now and we can’t assume all students have the necessary at-home learning tools. I wanted all of my students to have exactly what was needed for remote learning, so if it wasn’t provided by the school or local organizations, I sought out other avenues to cover some the cost. Fortunately, I received a generous grant from Thrivent Action Teams. The approval process was quick, and I was able to order everything I still wanted for my class before the start of the year orientation and pick-up. If a grant is hard to come by, consider other methods. I have found creating an Amazon with list, checking with my administrator, asking the parent-teacher organization, soliciting local businesses for donations, and inquiring about educator discounts has paid off in the past.
Remote Learning – Student Materials
Organization 101. Is there a college course for teachers on this? Well, there certainly should be. Being organized is the first step to establishing a well-functioning classroom environment. When I learned that we would start the school year with 100% remote learning, I put all of my initial focus on organization.
I love to color-code everything! I highly suggest selecting a color for each subject and using it for both physical and digital materials. Choosing uniform colors starts with the supplies you are provided, such as workbooks. Since our math workbook is blue, I made the other math materials that color. Since yellow spiral notebooks were provided as a student supply this year, I made all writing materials yellow. The uniform colors will help kids and families categorize content. Magazine files make great subject totes. Remember to use a splash of these colors on your presentation pages to tie it all together. Check out the at-home classroom I provided each of my students for remote learning (3 subject totes, clipboard, dry-erase board with markers and eraser cloth, workbooks, journals, folders with resources, Scholastic News magazines, books, red/green communication paddle, etc.).
Since every students has identical materials, it makes transitions during lessons smoother. No one has a good excuse for not having the item or knowing what/where it is! “In your green reading tote, find your green reader response journal.” Color-coding has maximized my time-on-task with students.


